
Perennials are wonderfully reliable, but by September, some of them start looking like they’ve had enough of summer. Spent flowers, floppy stems, yellowing leaves… the garden goes from lush to slightly exhausted surprisingly fast.
That doesn’t mean everything needs a dramatic haircut, though. Get the timing right, and they’ll come back next spring looking healthier, cleaner, and ready for another good season.
Why Early-Fall Is The Prime Time For Cutting Back

By September, a lot of perennials are simply looking done. The flowers are fading, stems are leaning everywhere, and some leaves look like they’ve been through a rough summer.
That’s what makes early fall such a useful cleanup window. Trimming away spent, damaged, or diseased growth now can reduce pest and fungal problems and leave plants in much better shape to start fresh next spring.
If you’re still unsure what deserves the pruners this month, we wrote a full guide on what to cut and what to leave in September.
11 Perennials To Cut Back In September

Here are the perennials I’d reach for the pruners for first this September:
1: Peonies
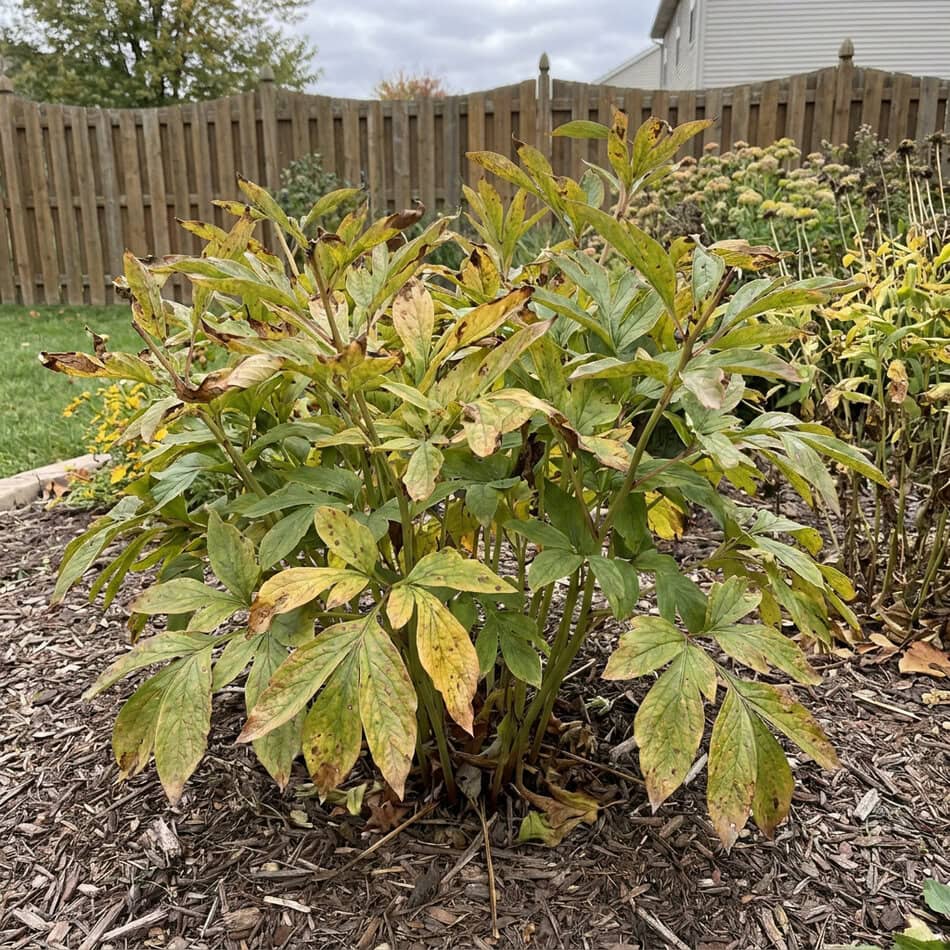
Peonies are one of those plants I’m happy to ignore for most of the year, but by fall, their foliage usually tells me when it’s time to step in.
Once the leaves yellow or frost knocks them back, I cut the stems down to about 2-3 inches above the ground and remove the old foliage.
Quick tip: If the foliage is spotted or diseased, don’t compost it. Bag it and get it out of the garden so those fungal problems aren’t waiting for you again next spring.
Timing makes a big difference with these, so we also wrote a guide on whether to cut peonies back in fall or leave them standing through winter.
2: Hostas
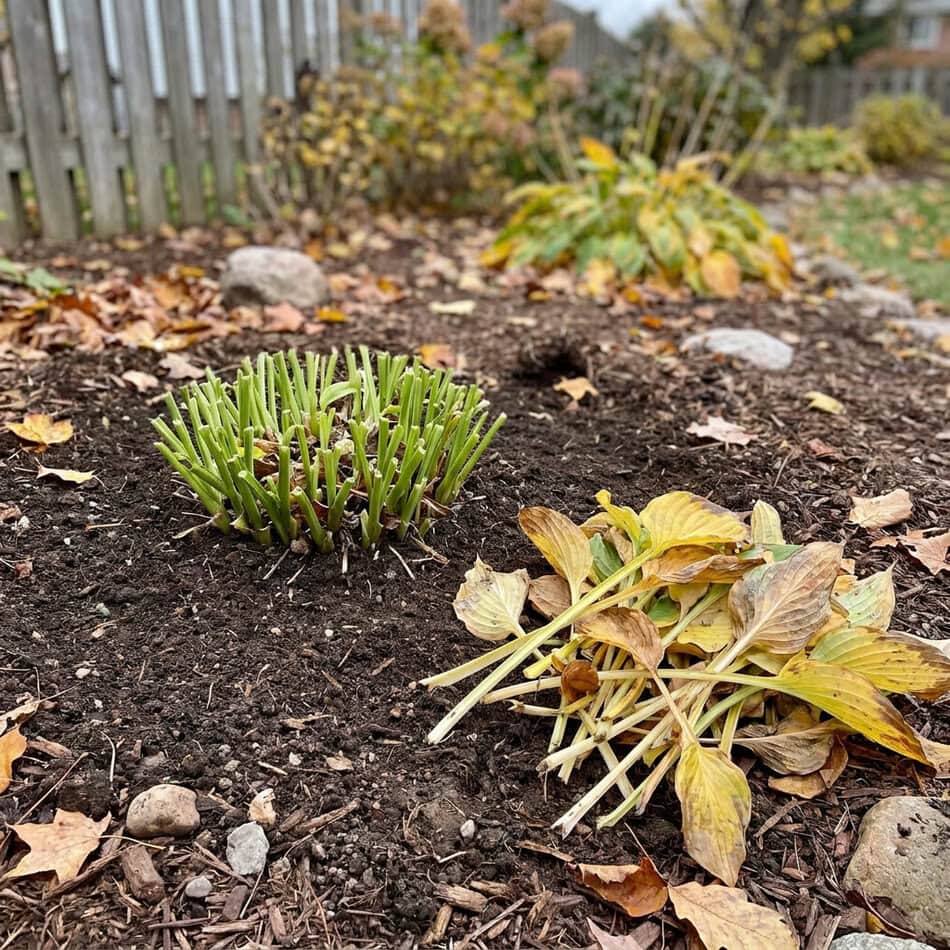
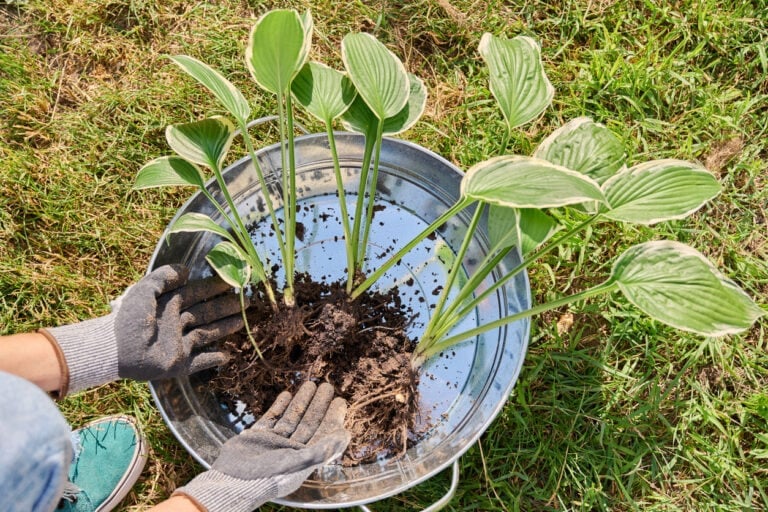
Hostas look great all summer, but after the first few frosts, those big leaves can turn into a soggy mess almost overnight.
Once the foliage has yellowed or collapsed, I cut it back to about 2-3 inches above the ground and clear away the old leaves. It keeps the bed tidy and removes damp debris where slugs and other pests like to hide.
Quick tip: Don’t rush to cut healthy green leaves just because it’s September. Let them keep feeding the crown until they start yellowing naturally.
If yours are already looking pretty rough, we explain exactly how to trim back yellowing hosta leaves without cutting healthy growth too soon.
3: Daylilies
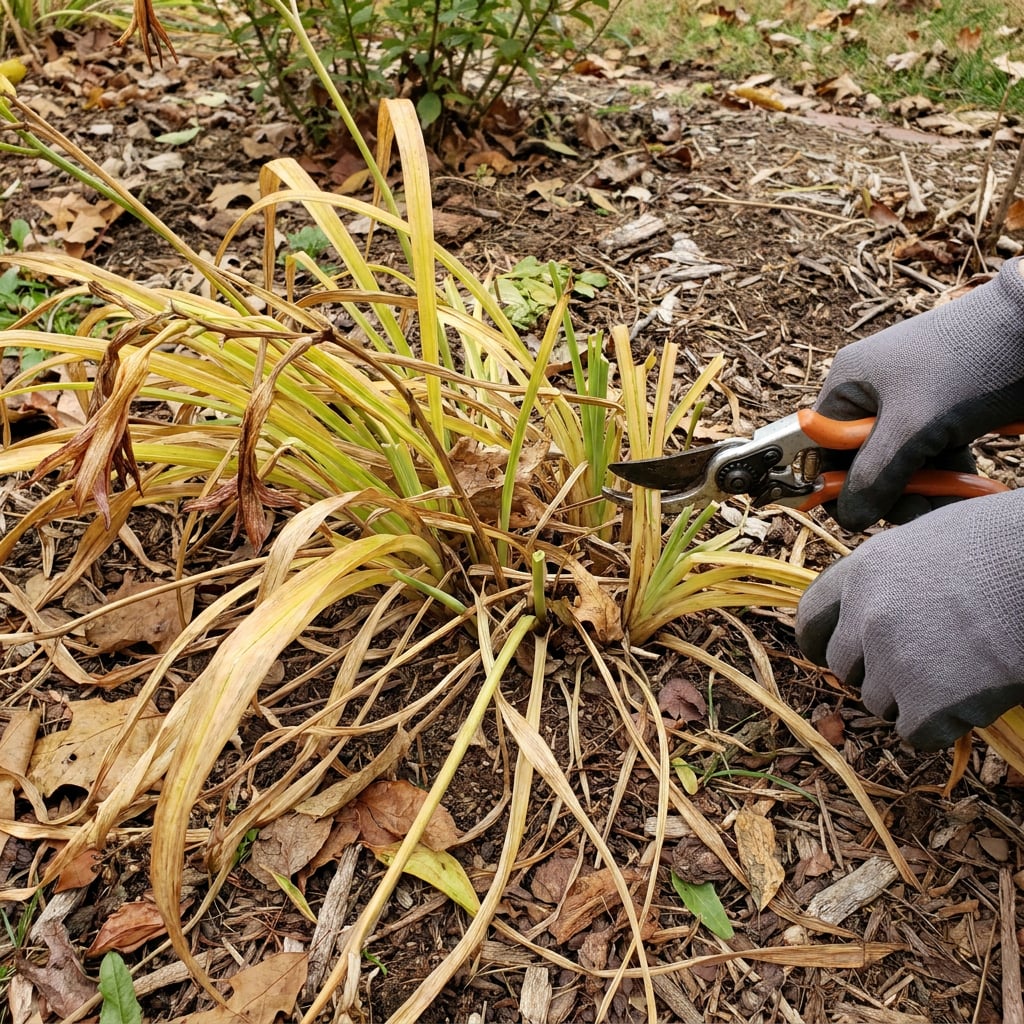
Daylilies can look pretty rough by September. Yellow leaves, floppy stems, and old flower stalks sticking up like they’ve forgotten the season is over.
Once the foliage starts yellowing and dying back, I cut it down to about 4-6 inches above the ground and remove any dead or spotted leaves. It clears out old growth that can harbor pests and disease and leaves the crown nice and tidy for next spring.
Quick tip: If your daylily leaves are still green, leave them alone for now. They’re still feeding the roots, so wait until they naturally start turning yellow before reaching for the pruners.
We also have a full guide on when and how to trim back daylilies if yours need more than a quick fall cleanup.
4: Bee Balm
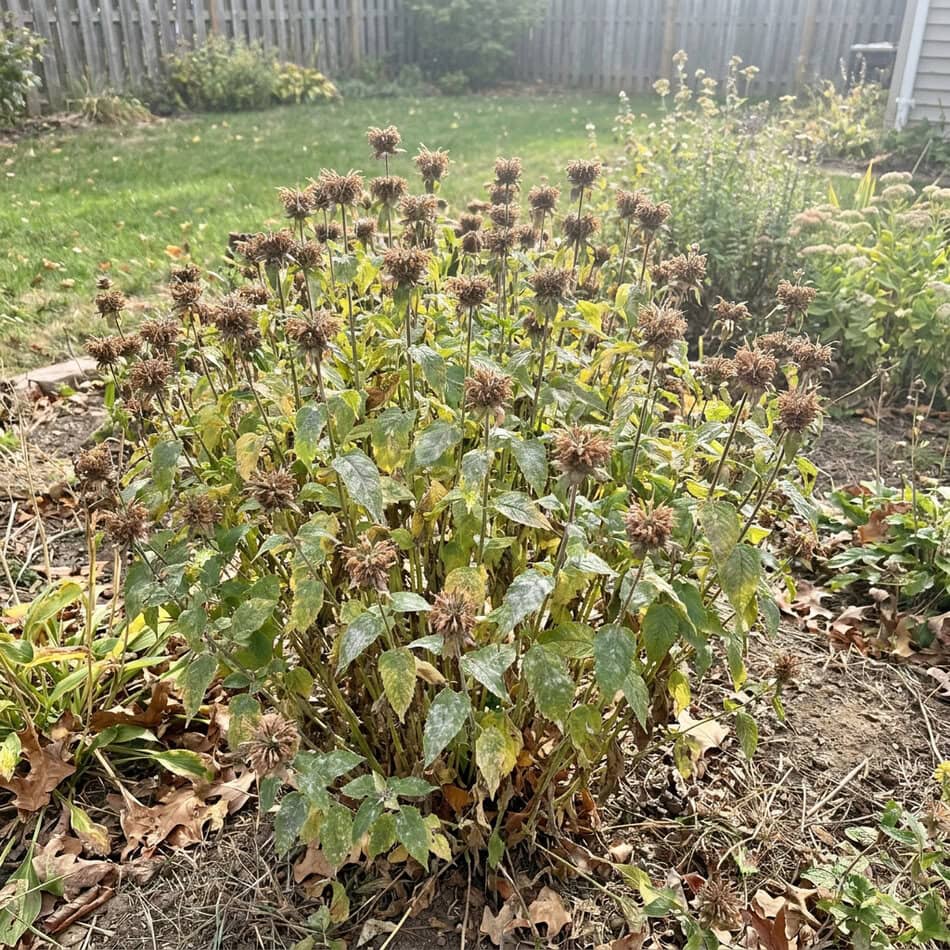
By September, my bee balm often looks great from a distance… until I get close enough to see the powdery mildew!
Once flowering is finished and the foliage starts declining, I cut the stems back to about 4-6 inches above the ground, especially if mildew has taken over. Removing that infected growth helps keep fungal problems from hanging around into next season.
Quick tip: If powdery mildew shows up on your bee balm every year, the clump may be getting too crowded. Thin or divide it in spring to improve airflow, it can make a noticeable difference.
5: Garden Phlox
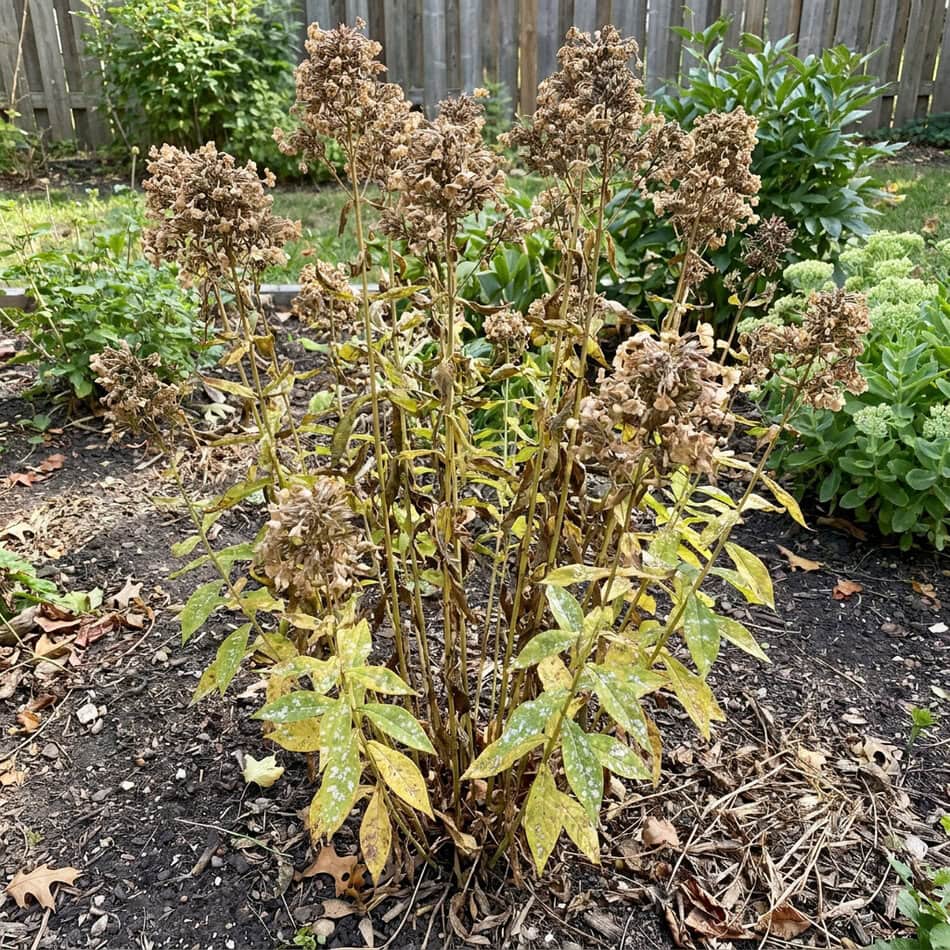
Garden phlox has a talent for looking gorgeous in summer and a little tragic by September, especially once that familiar white powdery mildew moves in.
After flowering, once the foliage starts declining, I cut the stems back to about 2-4 inches above the ground and remove any diseased leaves. Getting that infected growth out of the bed can reduce the amount of fungal trouble that carries over into next year.
Quick tip: Don’t forget the leaves already lying around the base. Rake those up too! Cutting the stems but leaving infected debris behind rather defeats the purpose.
6: Bearded Iris
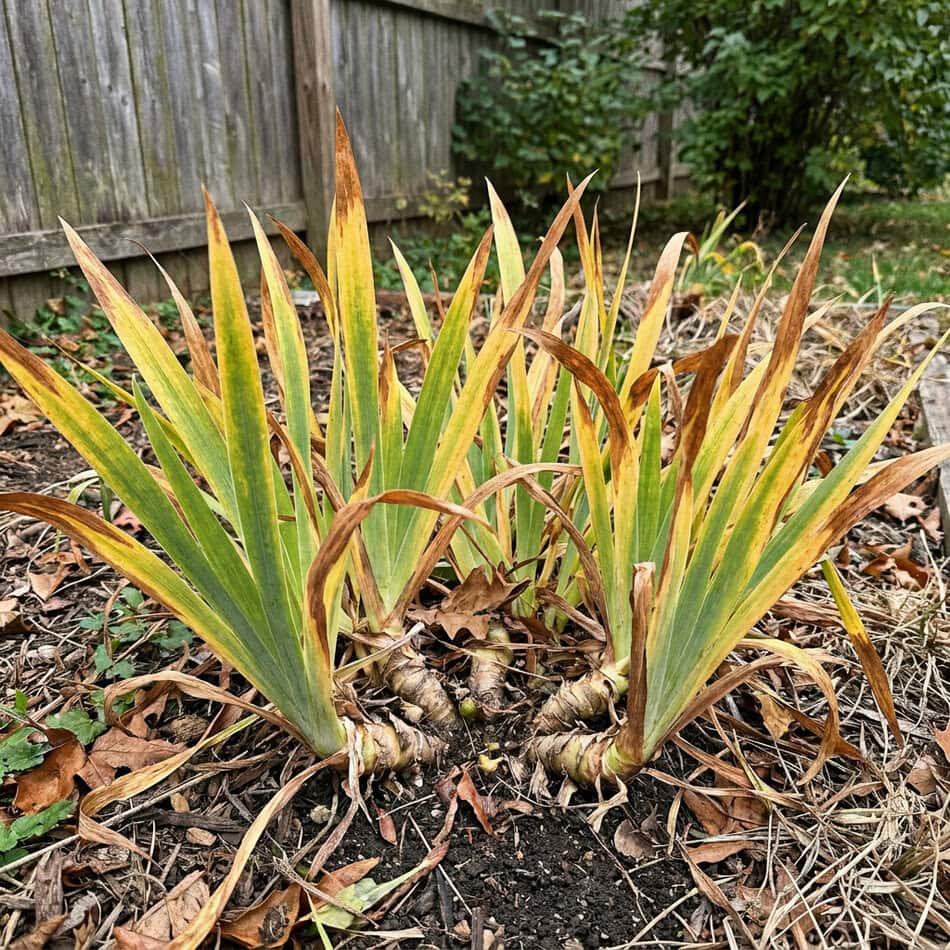
Bearded iris leaves can get pretty scruffy by fall, but I resist the urge to chop them down while they’re still green because those leaves are still feeding the rhizomes.
Once the foliage yellows or frost finishes it off, I cut it back to about 6 inches above the ground and remove any spotted or damaged leaves. That cleanup is especially useful for getting rid of places where iris borers and disease can overwinter.
Quick tip: While you’re down there, check that the rhizomes haven’t disappeared under mulch or soil. Bearded iris rhizomes like their tops exposed to the sun, not tucked in like potatoes.
Iris timing can be surprisingly easy to get wrong, so we explain when and how to cut back iris leaves in more detail in this guide.
7: Yarrow
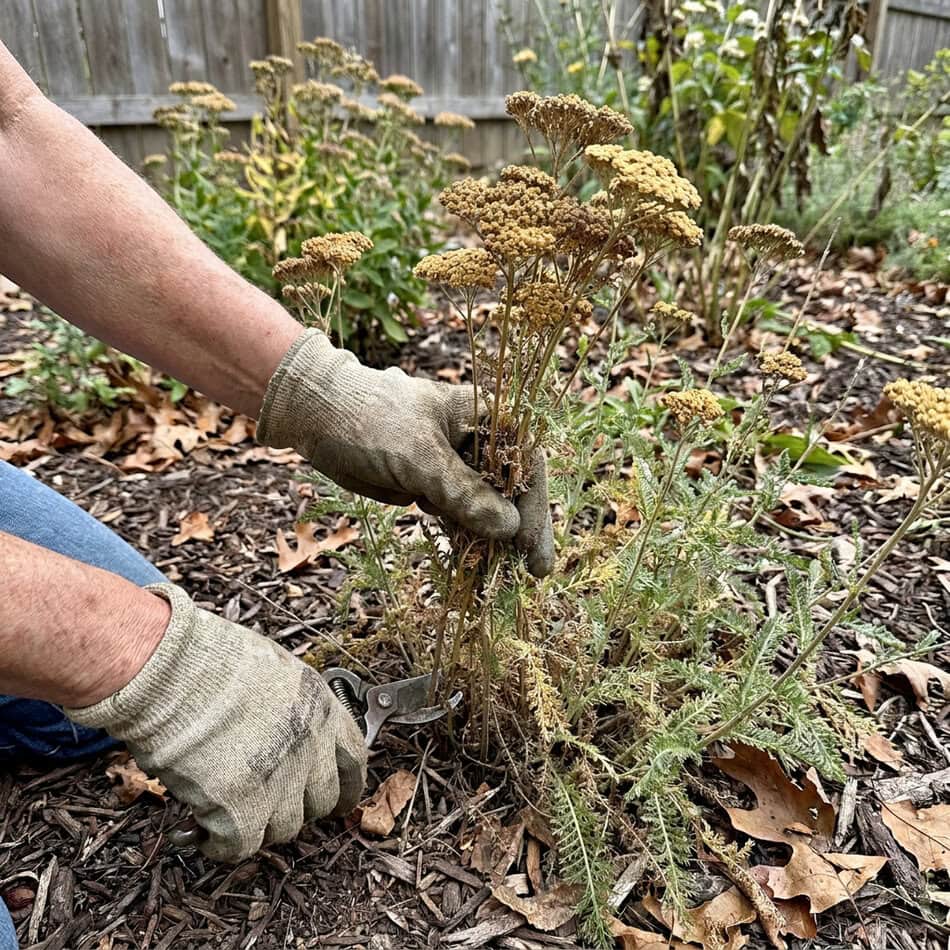
By September, yarrow can go from neat and upright to looking like it lost an argument with the wind. The flower heads fade, stems flop, and the whole clump starts spreading out.
Once flowering is finished and the stems begin to brown, I cut them back to a few inches above the basal foliage. This clears away tired growth while leaving the healthy leaves at the base to carry the plant into winter.
Quick tip: Yarrow can self-seed enthusiastically. If you don’t want little yarrow plants popping up everywhere next year, snip off the spent flower heads before they drop seed.
8: Black-Eyed Susan
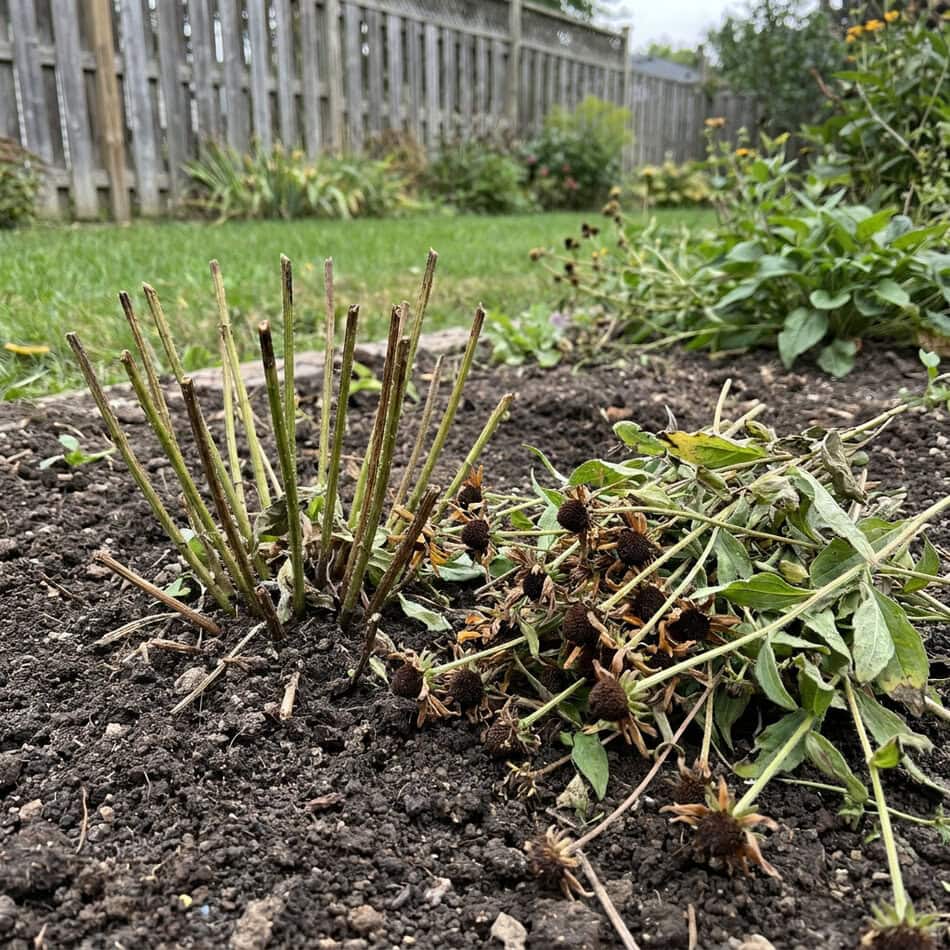
Black-eyed Susans are usually still putting on a decent show in early fall, so I don’t rush in with the pruners the minute September arrives. Once flowering winds down and the stems start looking tired, I cut back the roughest growth and remove anything diseased.
Later, after frost finishes the plant off, the remaining stems can be cut down to about 3-4 inches above the ground.
Quick tip: I always leave a few seed heads standing. Goldfinches love them, and watching the birds pick them clean is a lot more entertaining than an empty flower bed.
If you’re never quite sure which faded flowers should stay and which should go, we put together a guide on what’s actually worth deadheading in September.
9: Shasta Daisies
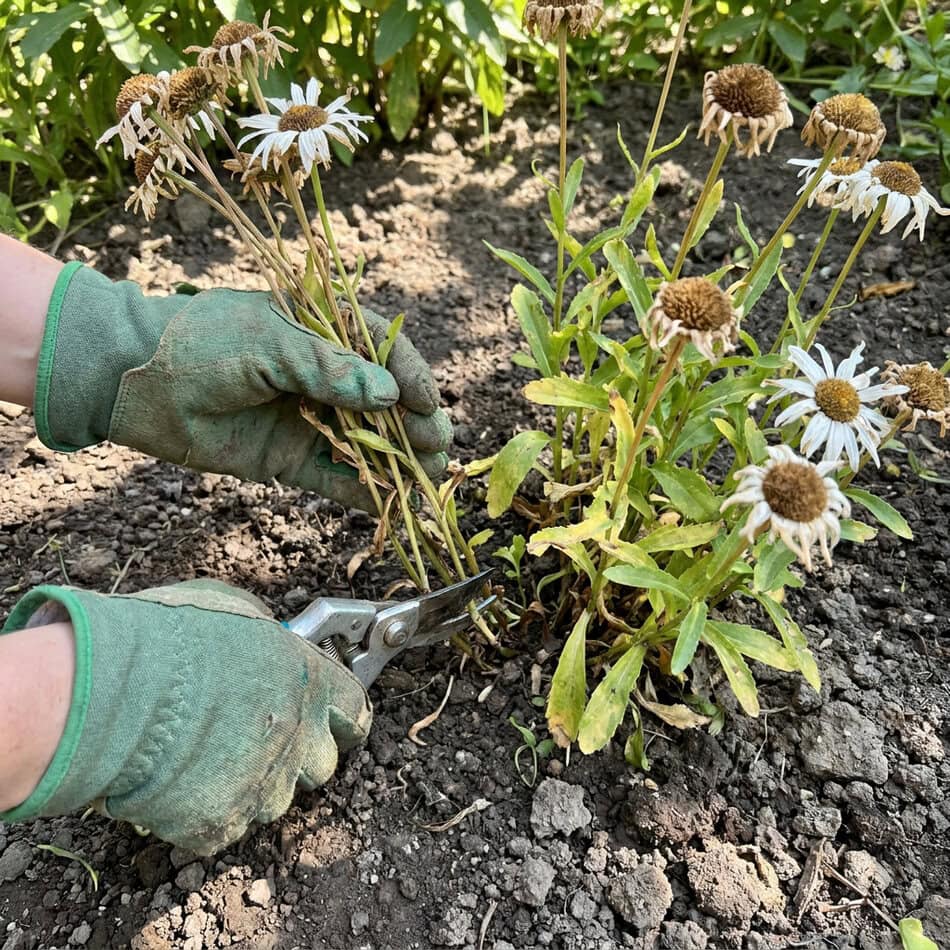
Shasta daisies look so cheerful in summer, but by September mine usually start getting a bit lanky, brown, and well past their best.
Once flowering is finished and the foliage begins to decline, I cut the stems back to about 2-3 inches above the ground and remove any spotted or damaged leaves. This clears out old growth that can harbor disease and gives the crown a cleaner start next spring.
Quick tip: If the center of your clump looks thin or bare, make a note to divide it in spring. Shasta daisies often start flowering less when they get overcrowded.
10: Catmint
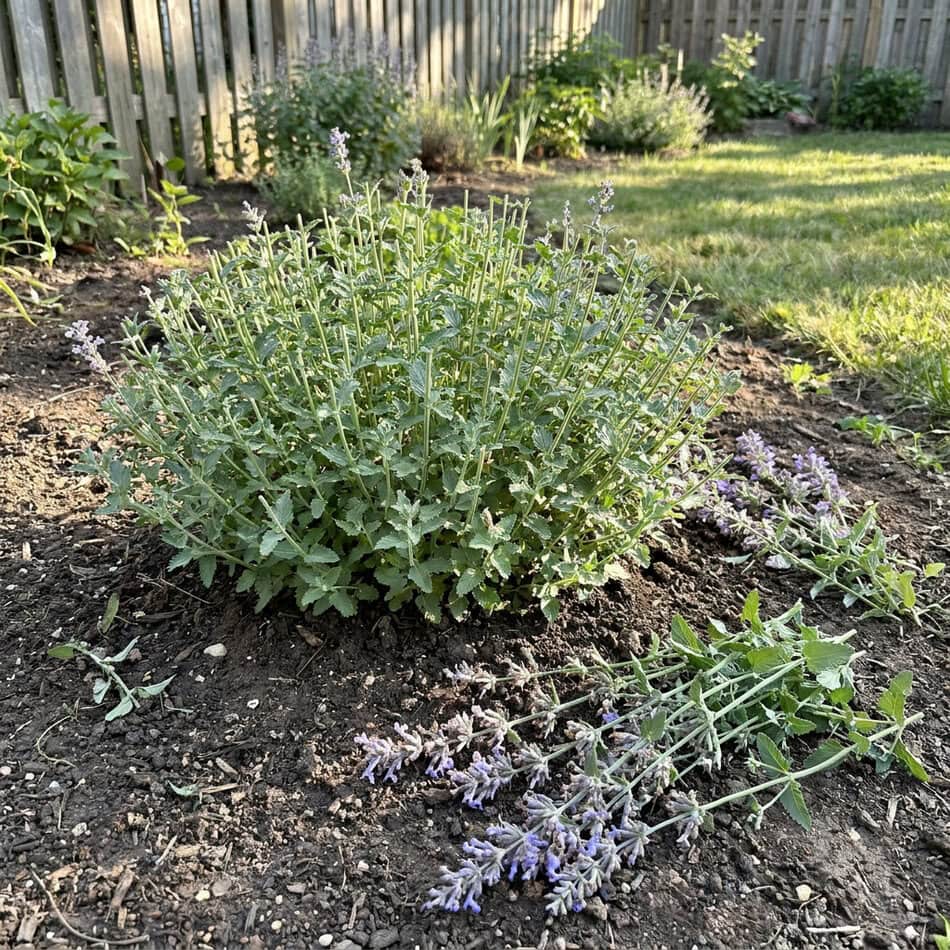
By September, catmint look like it’s trying to take over the sidewalk. The stems flop outward, flowers fade, and the neat little mound from spring is usually long gone.
Once the main flush of flowers is finished, I trim the tired stems back by about one-third to one-half, cutting just above fresh basal growth. That tidies the clump without stripping away healthy foliage it can still use before winter.
Quick tip: If your catmint gets floppy every year, give it a haircut right after its first big bloom next summer. It usually comes back shorter, bushier, and often flowers again.
11: Hardy Geraniums/Cranesbill
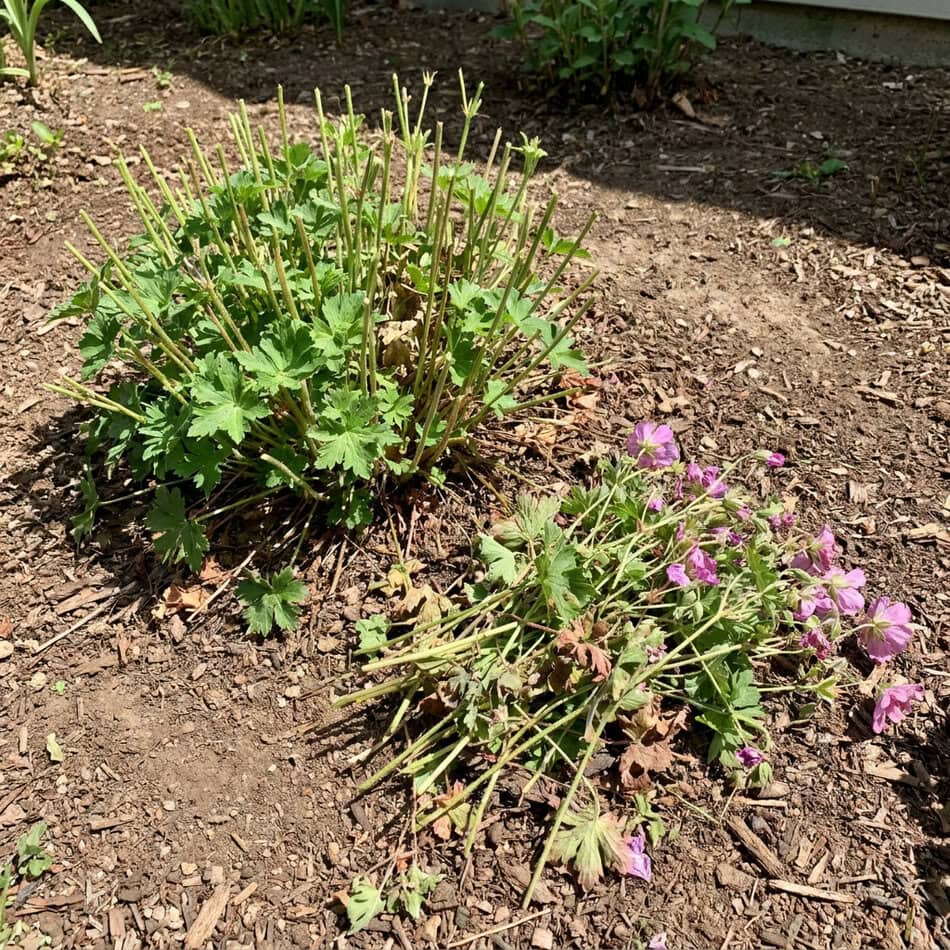
Hardy geraniums are brilliant ground-covering perennials, but once flowering slows down, mine usually look like a mix of floppy stems, tired leaves, and the odd flower still hanging on.
Once the main show is over, I trim the scruffiest stems and foliage back to just above the fresh growth at the base. It tidies the clump without removing the healthy leaves it can still use going into fall.
Quick tip: Don’t confuse hardy geraniums with the colorful annual “geraniums” sold in pots. Cranesbill is a true perennial and comes back year after year.
And if some of your perennials have gone beyond untidy and are simply getting too crowded, we also explain which perennials you can divide in September for healthier growth.
Some Perennials You Must Leave Alone

As tempting as it is to keep going once the pruners are in my hand, some perennials are much better left standing through fall and winter. Their stems and seed heads can protect the plant, feed birds, and give beneficial insects somewhere to shelter.
The big lesson here is simple: don’t cut everything just because fall has arrived! Some perennials benefit from a good cleanup, while others are doing perfectly fine standing there looking a little wild.
I usually tidy what’s diseased, damaged, or clearly finished for the season, then leave the rest to the birds, insects, and winter weather. Your garden doesn’t need to look spotless to be healthy.
If you also want to save a few for yourself, we wrote a guide on flower seeds you can still collect in September.
How September Cutbacks Change by USDA Zone

September in Minnesota is very different from September in Georgia, so I never treat fall pruning as a one-date-fits-all job.
The easiest rule? Watch the plant as much as the calendar. If it’s still green and happy, there’s usually no prize for being the first person on the block to cut it down.
Once the trimming is under control, you can move on to the fun part, we also have a guide on flowers you can plant in September for a beautiful spring display.
A Little Fall Cleanup Goes a Long Way
Fall cleanup is useful, but the goal isn’t to leave every flower bed looking freshly shaved.
Cut back the perennials that are truly finished, clear out diseased growth, and leave anything that’s still healthy or useful to wildlife. That little bit of restraint now can make for cleaner, healthier plants when spring comes around.
And once everything that actually needs cutting is done, step away from the pruners. I know, that’s sometimes the hardest part! It’s easy to get carried away, but trust me, more cutting isn’t always better.




I live in Massachusetts what about tall
Ornaments grasses, when ahould they be trimmed
Hi Karen! 😊 In Massachusetts (Zone 5 to 6), it’s best to leave tall ornamental grasses up through winter, they add beautiful texture and protect the crown from cold. Then trim them back in late winter or very early spring, just before new growth starts pushing up. I do mine around March!
Hi Rita I am in Philadelphia pa zone 7a/b when is a good time to cut back my ornamental grass
Hi Susan 🙂 In Philadelphia, I’d leave most ornamental grasses standing through winter and cut them back in late winter or early spring, usually around March, before the fresh growth starts coming through.
this is really helpful, thank you. Some I knew about, other’s not. I am in zone 5 a/b
I will put this link on my blog, as I have a number of other people who would find this useful.
Hi Gill! That’s so kind, thank you! 😊 I’m really glad it was helpful, and I appreciate you sharing the link on your blog. Hope it helps your readers too, especially in Zone 5!
Show the map with zones please
Hi Judy! We can’t publish the map but you can just Google your ZIP code + “USDA zone” and it’ll show you exactly where you fall on the zone map! Super helpful for knowing what to plant and when 😊
I planted phlox, clethera and a northern sea oats this month. Should I wait till next fall to cut them back?
Hi Linette! 😊 Since you just planted them, I’d wait until next fall to cut them back. Let them keep their foliage through winter so the roots can settle and get stronger first.
This info is really great. I have a hibiscus that needs pruning…but when? It is a couple years old, and has been neglected….but still has some beautiful 10 inch blood red flowers from time to time.
Hi Judith 🙂 Those huge 10-inch flowers sound like a hardy perennial hibiscus. If so, I wouldn’t prune it while it’s still flowering. Wait until frost finishes the top growth, then you can cut the stems back to around 3 to 4 inches above the ground. Don’t worry if it’s slow to return next spring, hardy hibiscus is notoriously late to wake up! 😂
I live in Western PA and have a 7 foot split leaf cone flower that is pretty much done too about 4 feet and only stems and some of the flowers are still there. With all the rain and wind it has fallen over cramping the black eyed Susan and comb flowers underneath it. Should I cut that back to the ground at this point or just leave it?
Hi Jean 🙂 Since your cutleaf coneflower has already fallen over and is smothering the plants underneath, I’d go ahead and remove those badly flattened stems. You can leave any upright stems and seed heads for the birds rather than cutting the entire plant to the ground right now. Cutleaf coneflower naturally gets very tall and can splay like this.
I just moved to Polson, mt. I have five lilac bushes in containers. How do I take care of them for winter?
Hi Linda 🙂 In Polson, I’d give those pots some winter protection because roots in containers get much colder than roots in the ground. If you can, planting the lilacs in the ground before it freezes is safest. Otherwise, group the pots somewhere sheltered and insulate around them well with leaves or straw. Keep them outdoors and dormant rather than bringing them into a warm house.
Is it ok to remove dying leaves on your day lilies as they turn yellow?
Hi Kathy 🙂 Yes, absolutely. Once individual daylily leaves turn yellow or start dying, you can remove them. Just leave the healthy green foliage in place because it’s still feeding the roots. That’s exactly what I recommend in the article too.
I have an Iris garden (Van Gogh).How do I keep or get the grass out.
Hi Cathie 🙂 Grass can be a pain once it gets tangled through iris rhizomes.😣 I’d pull or carefully dig it out by the roots. If it’s really woven through the bed, the easiest solution is to lift and divide the irises in late summer, remove all the grass roots, then replant the clean rhizomes.
Hi I am in zone 6 B and I am wondering about a few of my plants that I want to bring inside and keep alive for the colder weather. I have a geranium and a Fuschia can I bring them indoors or is it a waste of time? I also have Spanish lavender should I be trimming it back and how much?
Hi Tania 🙂 Your geranium and tender fuchsia are definitely worth trying to overwinter indoors before frost.
For the Spanish lavender, I would not cut it back hard this fall. Just remove spent flowers or give it a very light trim. Zone 6b is borderline or too cold for many Spanish lavender varieties, so if yours is in a pot, I’d protect it somewhere sheltered and frost-free for winter.
What about butterfly bushes, when and how low should we prune back
Hi Gwen 🙂 For most butterfly bushes, wait until late winter or early spring and cut them back to around 12 to 18 inches above the ground. They bloom on new growth, so I’d avoid a hard fall pruning.
I live in Northwest, this year my Rose has multiple yellow leaves. Not sure what happened this year.
Hi Bobbie 🙂 Yellow leaves on roses can have several causes, especially too much or too little water, nutrient issues, or fungal disease. If you’re seeing dark spots along with the yellowing, black spot would be high on my list. I’d check the leaves closely and make sure the soil isn’t staying constantly wet before adding fertilizer.
Your articles are so valuable to me, as I am never quite sure of the timing for planting, trimming, feeding, etc. Also, in knowing what species are invasive. Thank you for sharing your expertise with us!
Hi 🙂 Thank you so much! Timing can be one of the trickiest parts of gardening, so I’m really glad the articles are helping make it a little easier.