Rooting a rose from a single stem cutting is a satisfying project. But like trimming your cat’s claws, it doesn’t always go as planned… Results, naturally, are never guaranteed either way.
Nature takes its toll in wasted time, dead canes, and shattered gardening confidence. Unless you know how to give that cutting a fighting chance!
Choose a Suitable Stem
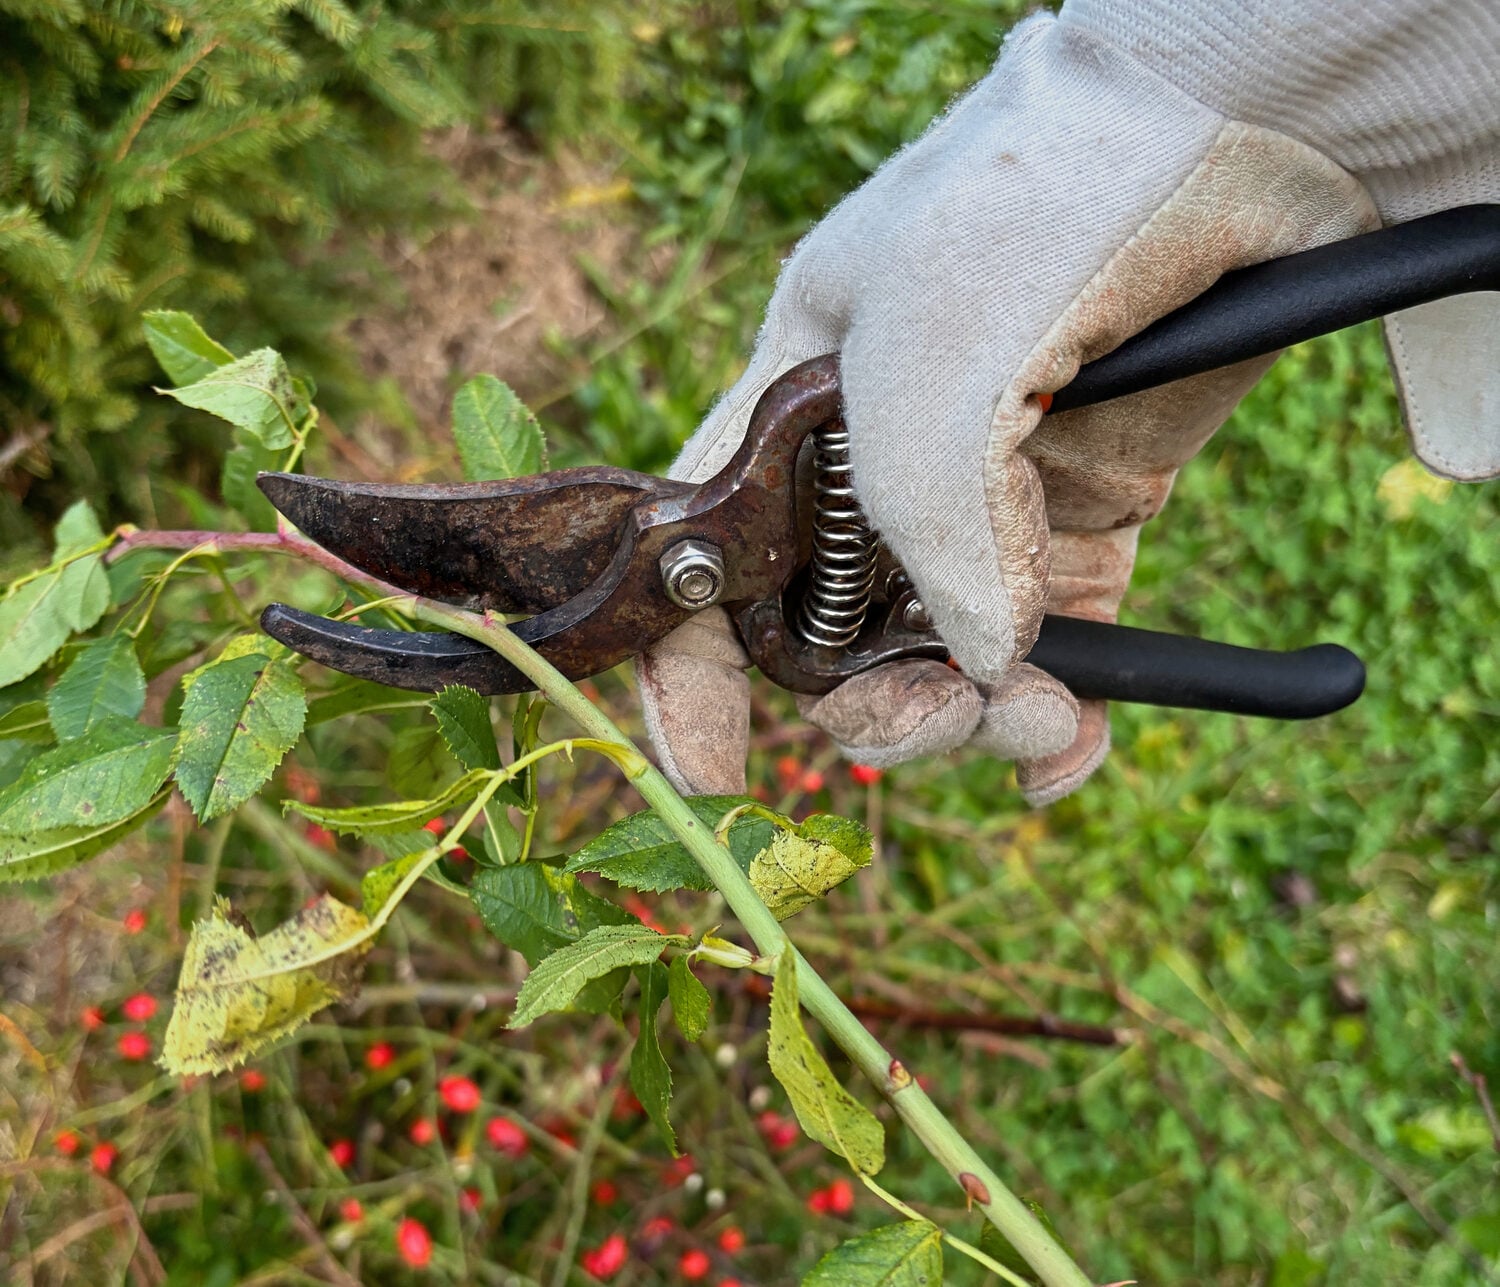
Before snipping anything, check whether your rose has an active plant patent. Propagating a patented variety without permission is prohibited, even for personal use. Nobody wants to become a garden criminal over a cutting!
Assuming your rose is in the clear, here’s what to look for:
Mornings offer the best harvest window, when stems are packed with moisture. Drop the cut ends into water or wrap them in a damp paper towel until you’re ready to pot them. Don’t let them dry out.
Grafted roses bring one final twist. Your cutting grows on its own roots, so its size and hardiness may differ from the original. Skip the potato and honey tricks. Clean tools, good timing, and a proper rooting mix will serve you better.
And if you’re wondering what to do with the rest of your rosebush after flowering, we wrote a guide on which roses to cut back after blooming and which to leave alone.
Prepare the Cutting
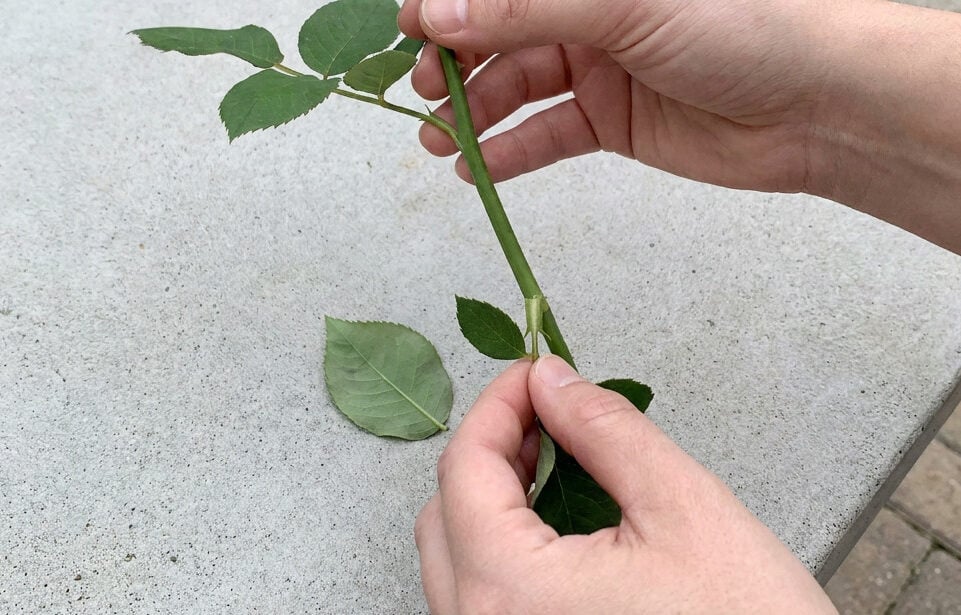
A little trimming goes a long way. Before planting, give your rose cutting a quick cleanup:
Now you’ve given your cutting its best shot at taking hold.
Set Up the Pot
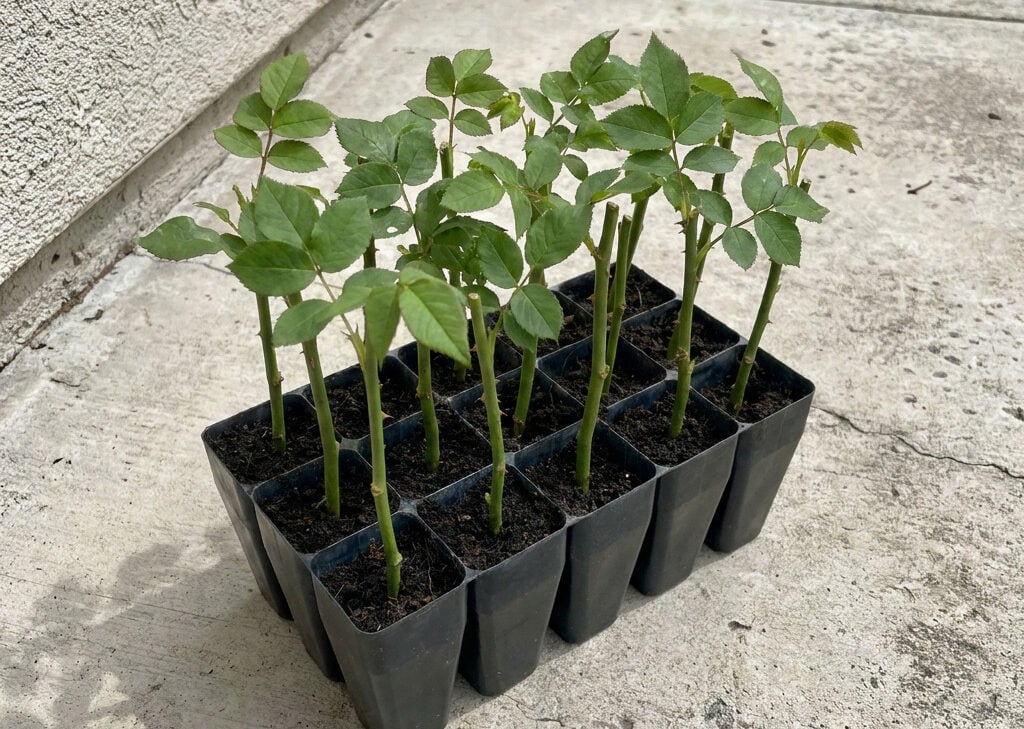
No heavy garden soil and no massive containers allowed. A 4-inch plastic pot with drainage holes is all you need. Now, let’s get that cutting settled:
That’s it. No fancy equipment, just a well-drained mix and a little care.
Humidify Without Rotting
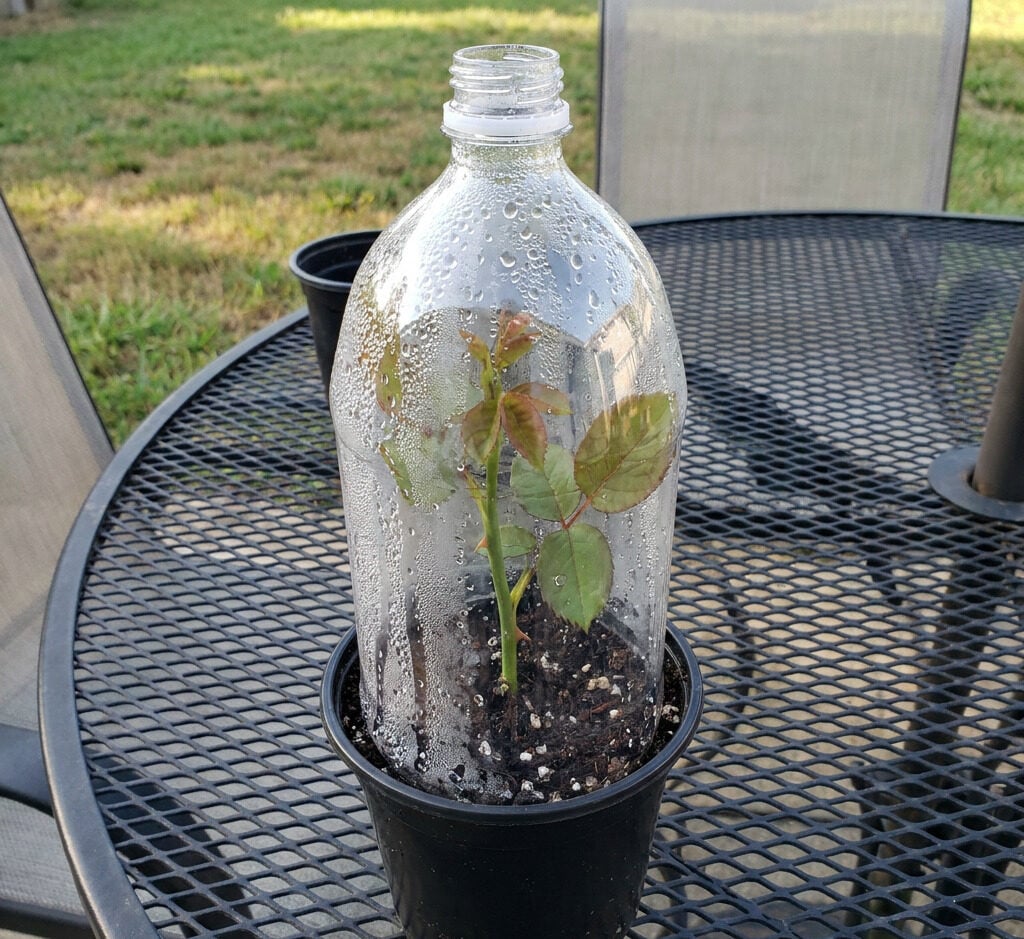
Rootless cuttings dry out fast, but too much trapped moisture invites rot. Grab a large, clear plastic soda bottle, hack the bottom off, and slide it over your cutting.
Bright, indirect light works best since direct sun can cook cuttings inside plastic real quick. A little condensation is normal, but if water starts dripping heavily or mold appears, lift the bottle briefly for fresh air.
Quick tip: Keep the plastic clear of the leaves and leave the cap off for ventilation. It helps keep fungal problems in check.
Dial In the Conditions and Check Progress
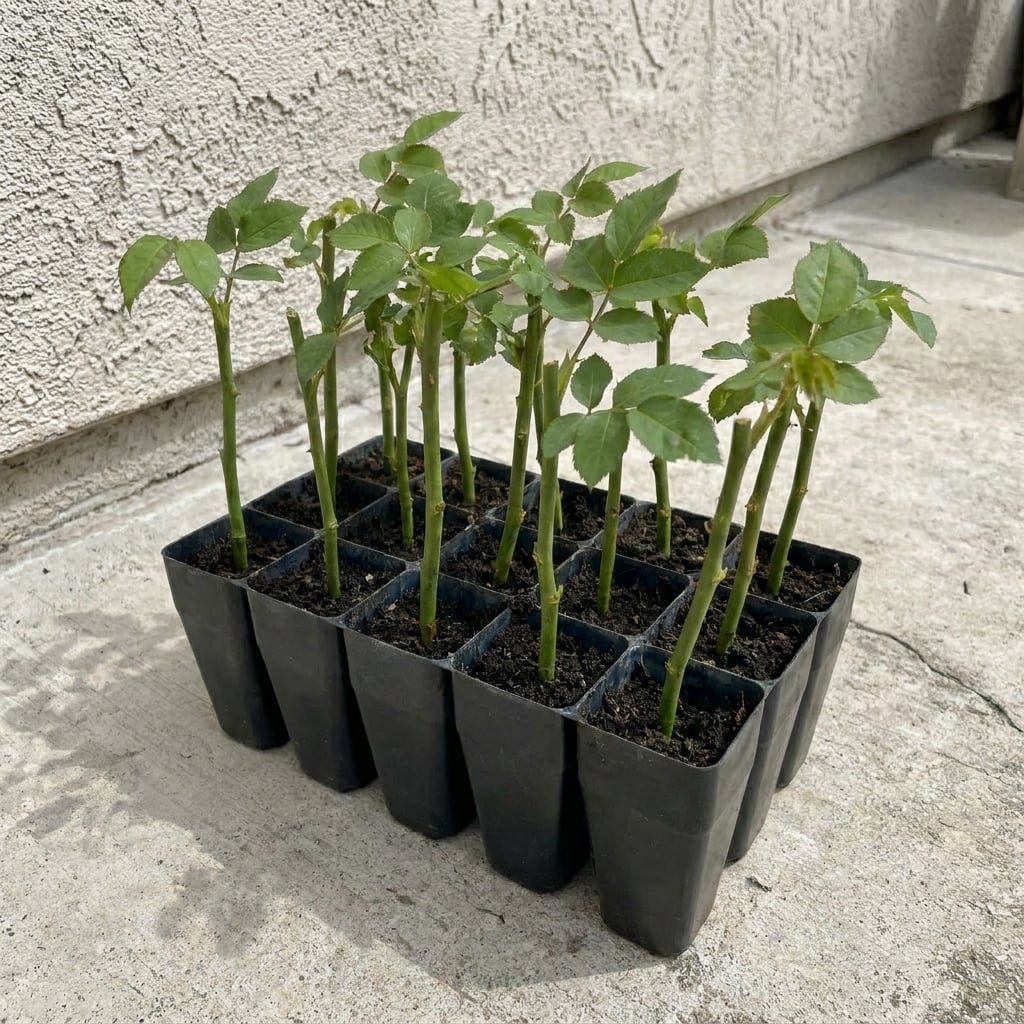
Forget daily watering cans. Soggy potting mix can rot cut stems before they root, but letting it dry out isn’t any better. Keep the mix evenly moist, never waterlogged.
Check the moisture with your finger every few days. If the surface starts drying out, water lightly and let the excess drain away. No need to drown the poor thing.
Keep the container between 65°F and 75°F. Cooler temperatures slow rooting, while excessive heat can turn that plastic bottle into a cooker.
Green leaves aren’t proof of success. Stems can push fresh growth using stored energy while remaining completely rootless below ground.
Give the process time. Some rose cuttings start rooting in four to six weeks, while others take eight weeks or longer. A callus may form around the cut base, but new roots don’t always need one to develop.
Resist the urge to pull the cutting out for inspection. Look for roots through the drainage holes, or give the stem one very gentle tug after several weeks. Those tiny roots snap easily.
Hardening Off
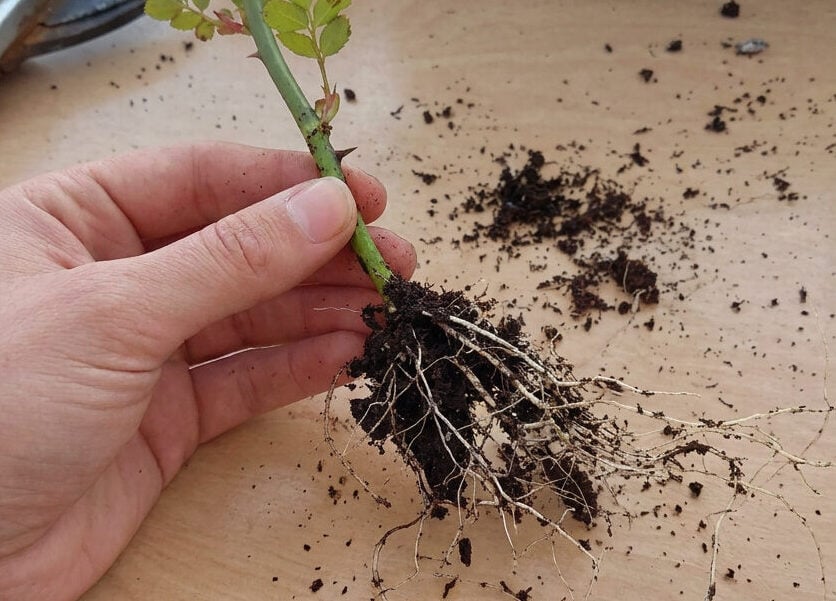
Once roots have developed, ditch the bottle cover in stages. Pull the plastic off for an hour or two daily, slowly stretching the exposed time until the leaves stay firm without the extra humidity.
Don’t rush the move to a bigger pot. Wait until the roots are established enough to hold the potting mix together. Those young roots snap easily, so handle the root ball gently.
Settle your rose into a slightly larger pot with fresh potting mix, and keep it sheltered from freezing temperatures while it gets established.
If you’re also looking after established rosebushes, we’ve put together a guide on how to mulch, prune, and protect roses through winter.
Playing the Long Cane
Not bad for a trimmed cane, a 4-inch pot, and an old soda bottle! And even if only one out of three cuttings makes it, you still win. Propagation is half biology, half luck.
You’ve officially beaten the odds when that young rose survives its first winter. Once it’s well-rooted and the weather warms in spring, transplant it into the garden. Just don’t expect a prize-winning bush overnight.