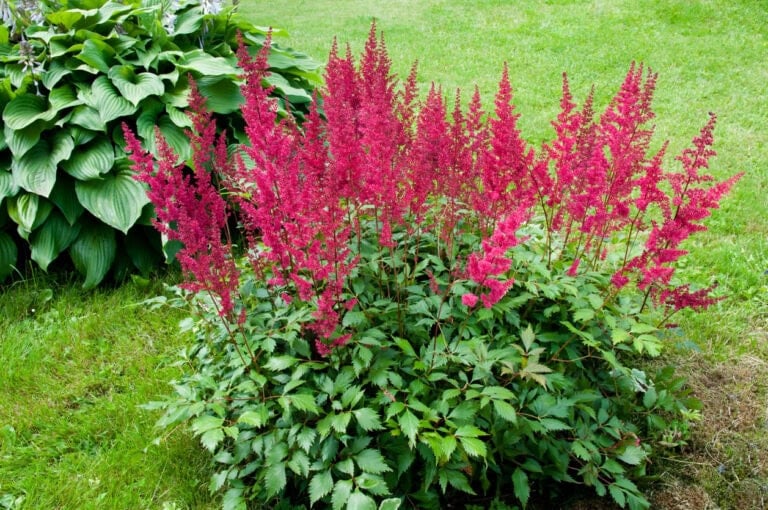
A wild Black-Eyed Susan thrives in a gravel ditch on a diet of exhaust fumes and misery.
You tuck it into a cozy garden bed, and three years later? The middle starts going bald while the edges strangle your other plants, and suddenly your “easy perennial” is acting like it owns the deed. It’s a stubborn plant. But guess what? We’re more stubborn.
Mid-June: Stop the Black Plague
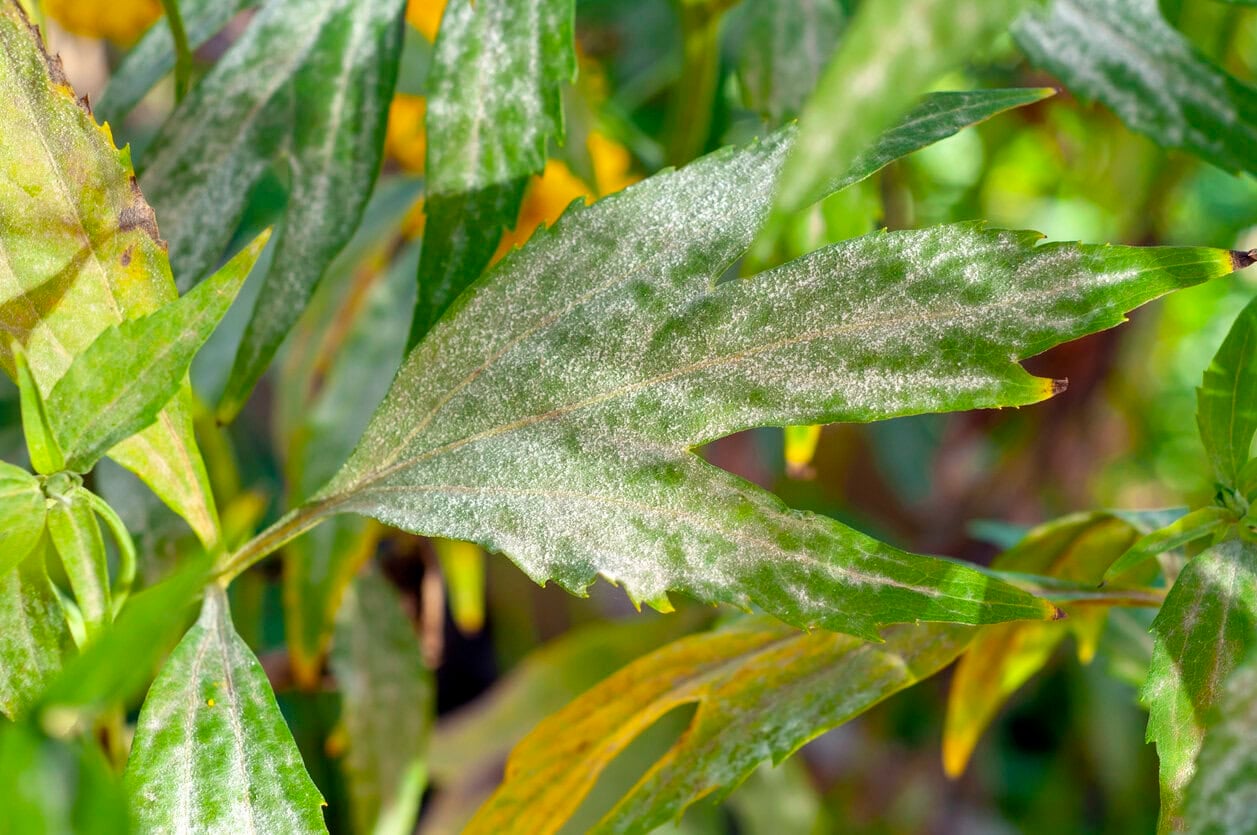
Right now, as summer humidity ramps up in many gardens across Zones 3 through 9, check the lower leaves. Do you see tiny, dark spots, yellowing foliage, or a dusty white-gray film? That’s usually Septoria leaf spot or powdery mildew is moving in.
Do not just watch it crawl up the plant. Snip off the worst infected lower leaves and throw them away (not on the soil).
If the clump has turned into a wall, cut out a few weak or crowded stems too. You want air moving through the middle, not a damp little fungus cave.
Late June: Clear the Floor and Kill the Sprinkler

Midsummer means the clock’s ticking…
By late June, nearby shrubs and tree branches have usually leafed out enough to start stealing sun. If they’re shading your Rudbeckia hard, you need to trim them back before your plants stretch into weak, floppy stems.
While you’re down there, pull the weeds too. They’re stealing moisture, crowd the base, and make the whole patch stay damp longer than it should.
And quit showering the leaves! Water at the soil level when the ground is dry, preferably in the morning. Wet, crowded foliage in summer humidity is how leaf spot and mildew turn a golden patch into a sad gray mess.
Early July: Remove the Aphids and Snails

Right as the first green flower buds form, the local pest crew gets hungry. Aphids may cluster on tender stems and buds, while slugs and snails will shred the lower leaves into ragged Swiss cheese.
Don’t panic-buy a spray bottle yet. Hit aphids with a firm morning blast from the hose, not a pressure washer unless you enjoy snapping flower stems. Then check again in a few days.
For slugs and snails, go out at dusk, act like the unpaid bouncer, and pick them off by hand. It’s gross, I know, but it works.
If slugs are the repeat offenders in your garden, we also have a guide on natural ways to keep slugs away without turning the bed into a chemical crime scene.
Mid-July: Cut the Deadweights Down to the Node
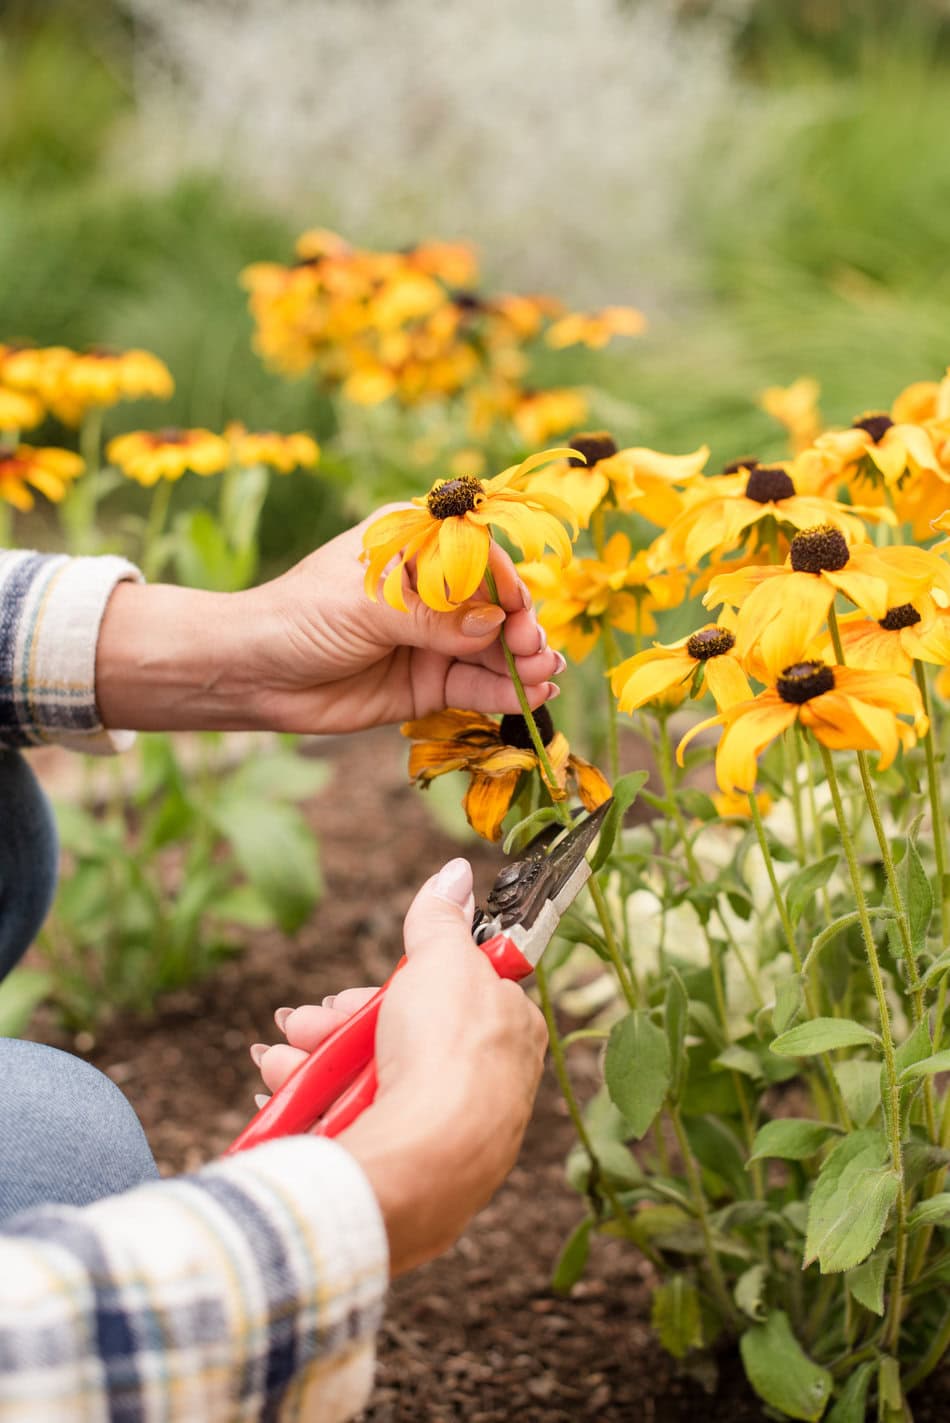
As the earliest flowers start to fade, do not let every single one sit there and turn into seed pods.
A few for the birds later? Yes. A whole patch going to seed in July? Not necessary. That’s how the show starts packing up early.
Plucking off just the dead face looks tidy, but I get better results cutting the stem back to the next lower leaf node. That little cut tells the plant, “Nice try, but we’re not done yet.“
It will not magically double the plant overnight, but it does redirect energy away from seed-making and gives the lower buds a better shot at pushing out another round of color.
If you want the full pruning breakdown, we explain exactly when to deadhead, cut back, or leave Black-Eyed Susans alone in our guide on cutting back Black-Eyed Susans after bloom.
Late Summer: The Brutal Midseason Prune
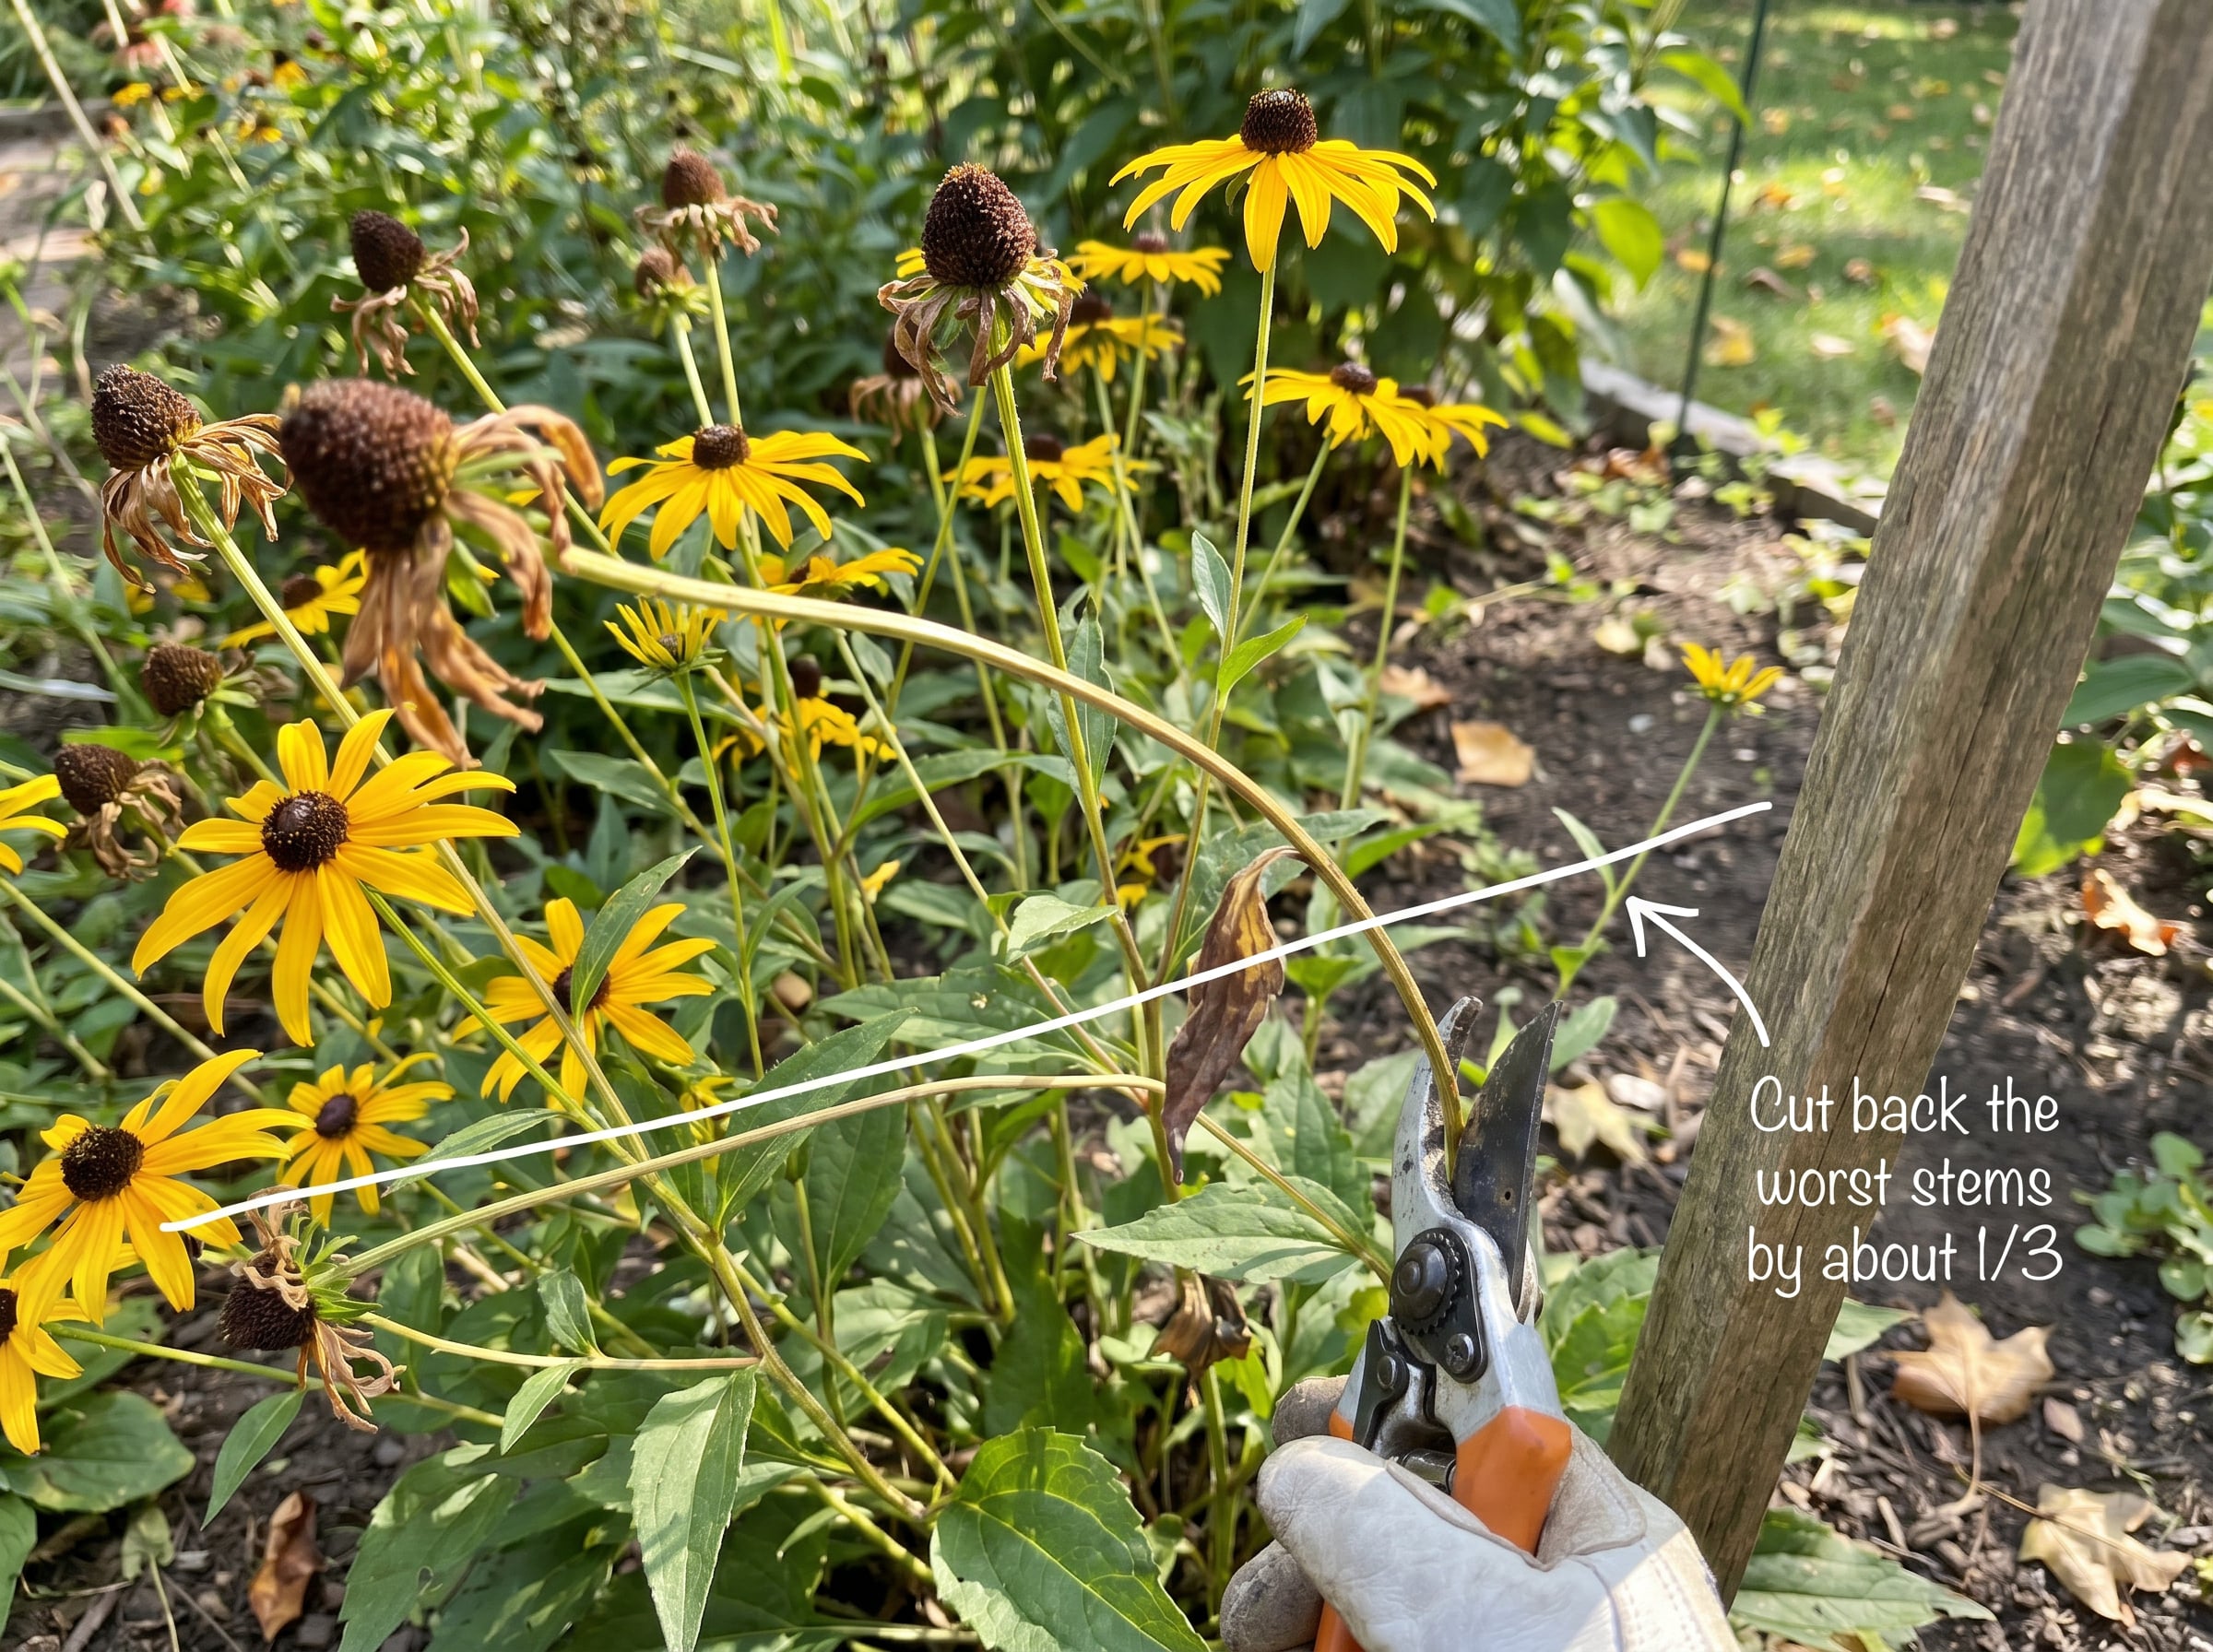
By late July or early August, the first round of growth can look ragged, buggy, and personally offended by the weather.
If the patch is still healthy but ugly, I’ll take clean shears and cut back the worst stems by about one-third. But don’t cut the whole thing down to a sad little crew cut! This is just enough to clear out tired growth and push the plant to tidy itself up. Give it a deep drink afterward.
On a strong plant, that cut can bring cleaner new growth and a late-season round of color instead of a crispy patch sulking in the corner. But don’t try this on a drought-stressed clump that already looks like toast.
Early Fall: Leave the Cone Alone

This task is easy. Do absolutely nothing. Drop the trimmers, clippers, and shears for now.
Leave the brittle, spent seed cones standing if the plant is healthy. The local goldfinches will pick through them for food, and the dried seed heads look tough against gray fall weather.
The only exception is disease. If the foliage was covered in leaf spot or mildew, clean up the worst infected leaves instead of letting that mess sit under the plant all winter. Otherwise, let the cones freeze naturally before you do any late-season butchery.
We wrote more about this in our guide on plants you should not cut back in fall because birds actually use those seed heads through winter.
Early Winter: Clean Up and Feed Light

When the first hard frost finally knocks the drama out of your Black-Eyed Susans, that’s your cue to clean up the mess and help the bed settle in for winter.
If the seed heads are still feeding the birds, leave them a little longer. If the stems are broken or the foliage had leaf spot or mildew, cut them down to 2-inch stubs and remove the diseased debris.
If the bed looks tired, top-dress around the clumps with compost and let winter work it in slowly. Skip heavy fertilizer unless a soil test says the soil actually needs it.
Next Spring: Chop Up the Doughnut Clumps
After three or four years, the middle of a Black-Eyed Susan clump can start thinning out, leaving a weird empty ring of crowded stems fighting for survival as if someone tossed one cookie into a cage match.
You can usually spot the guilty patches now, but you need to wait until early next spring to fix them. Once the soil is workable, drive a sharp spade through the clump and pry up the tangled root mass.
Chop it into sections, toss the tired woody center if it’s dead or weak, and replant the stronger outer chunks with elbow room. Aim for 18 inches to 2 feet apart, measured center to center.
If you’re doing a bigger spring cleanup, we wrote a guide on perennials you can safely divide in early spring so you know what can handle the spade and what should be left alone.
Eye of the Tiger, Face of the Susan
Growing better Rudbeckia blooms is a game of chicken. The only risk is your nerves breaking before the new buds shoot up to prove these tips right.