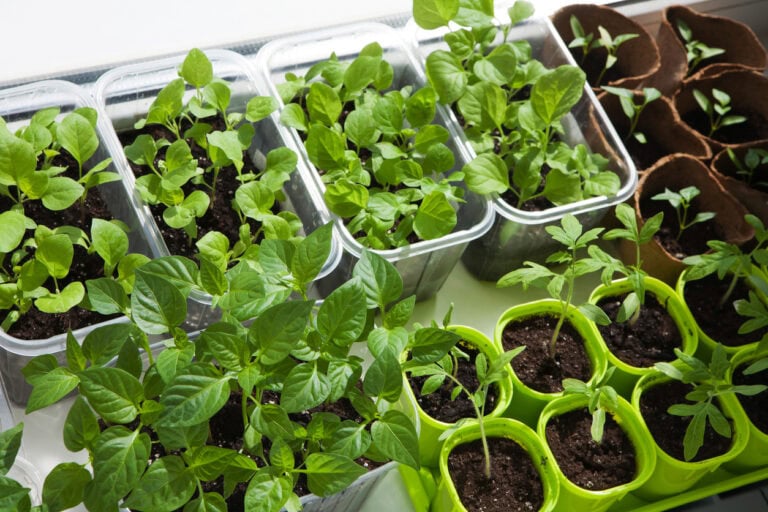
Some of our favorite plants come from the smallest seeds. Arugula, basil, carrot, and poppy are just a few varieties of seed small enough to make us question our gardening choices. The biggest problem with sowing small seeds is thinning all the extra seedlings – but there are ways to spread them out.
There’s no way around it – small seeds are more difficult to sow and germinate than their larger counterparts. Fortunately, techniques like mixing seed with sand and crafting seed tapes make the process a little easier. There are also several tools that make sowing small seeds feel less like a chore.
Before you spend this spring straining your eyes and your neck–bent over a seed tray–consider these small seed sowing hacks. Read on to discover how to successfully sow and germinate small seeds.
The problem with sowing small seeds
Small seeds are a little harder to germinate than large seeds. In nature, small seeds are usually produced in larger quantities to balance out their lower germination rate.
By design, small seeds don’t have as much food storage as large seeds–so small seeds typically aren’t viable season after season like large seeds tend to be. Since they have less protection in the seed coat than large seeds, small seeds are more susceptible to cold temperatures and excess moisture.
If you have a seed packet to reference, start there. Seed companies usually give detailed instructions about planting zones, lighting, and watering needs on the back of the packet. It’s common sense, but don’t overlook this step!
6 small seed-sowing hacks
Don’t let these realities about small seeds put you off from sowing your own! Use the following small seed-sowing hacks to make this cumbersome task significantly easier.
1. Cornmeal or sand
Mixing small seeds with cornmeal or sand is a popular technique, especially for broadcasting seeds outdoors.
A common “recipe” is to mix a pinch of small seed with a couple of tablespoons of sand or cornmeal. Mix the ingredients thoroughly–some gardeners even use a saltshaker–and scatter the mixture over the area you want to be seeded.
2. DIY seed tape
While making your own seed tape requires some effort, many gardeners have great success with seed bands. Seed bands can be easily made by using products you already have on hand.
These strips, typically made out of paper towels or toilet paper, allow you to see exactly where your seeds are. To use this technique, simply dig a small trough and cover with toilet paper, and start seeding! Cover with soil and the toilet paper will soon decompose.
Take your seed bands one step further and use a 1:1 mixture of flour and water to create a biodegradable “glue” to hold your seeds in place. Seed tapes like this can be made in advance, rolled up, and unrolled at a later date when it’s time to plant.
3. DIY seeding gel
Another more involved hack to sow small seeds is to make a seeding gel. This technique involves making a cornstarch paste on the stove, allowing the gel to cool, and then mixing it with small seeds. This method doesn’t guarantee an even spacing, but the gel does stretch small seeds out to fill a larger area.
4. Use a toothpick
For the gardener that has a lot of patience and time, you can use a toothpick, a pencil, or even a plastic plant label to sow small seeds individually or in pairs. Simply moisten the end of your chosen utensil with water and smaller seeds will cling to it, allowing you to sow small seeds with precision.
5. Buy pelleted seeds
A final seed sowing hack is to purchase pelleted seed. Pelleted seeds can be any type of small seed that is coated with clay or similar material, to make it easier to sow small seeds by hand or in a seeder. Many vegetables, including carrots and lettuce, come in pelleted forms.
Some gardeners argue against using pelleted seeds because these seeds are sometimes coated with fungicides and other chemicals. Pelleted seeds also tend to be more expensive than regular seeds because of the extra processing.
Like any other type of seed, pelleted seeds may be organic or they may not be–so take care to read the product description or packet thoroughly to know exactly what you’re getting!

6. Use a tool
There are a few seeding tools worth investing in if you plan on sowing a lot of small seeds. These seeding tools aren’t perfect by any means, but if you have a bad back, they’re excellent for direct sowing small seeds in your garden.
- Wolf Garten Multi-Change Small Seed Sower
This seeder from Wolf Garten is great for sowing small seeds. You can purchase a handle that attaches to the head and allows you to walk through your garden rows, sowing seed without bending over. With six different sized settings, the Wolf Garten Multi-Change Small Seed Sower fits a variety of small seeds, and even seeds as large as peas.
- Johnny’s Hand Seed Sower
Johnny’s Seeds, a popular seed company, makes a handheld seeder that makes sowing small seeds in flats easy! This simple seeder has five different adjustable settings that allow you to control what size seed to use and how much of that seed. Simply open the cap, add your seeds, and select the appropriate setting. You still need to be careful with the flow of seeds, but it’s much better than manually handling them.
- Earthway Precision Garden Seeder
There’s another seeder for direct-sown seeds – the Earthway Precision Garden Seeder. The most expensive tool listed in this arsenal, this walk-behind seeder comes with seven interchangeable seed plates to fit a variety of seeds from carrots and radishes to beans and peas. You can order specialized plates to fit even smaller seeds.
After you sow small seeds
However you choose to sow your small seeds, there are a few additional steps you should take to ensure that even the tiniest of seeds will sprout into healthy seedlings.
Cover with vermiculite or sand
Most small seeds require light to germinate. Instead of burying small seeds under potting soil, gently press small seeds into the soil with your hands or stack another seed tray on top and gently compress.
To protect seeds from the sun and wind, cover them with a thin layer of vermiculite. Vermiculite, a lightweight volcanic rock, is an excellent choice to cover seeds, but it is a little more expensive. A cheaper alternative to vermiculite is coarse sand.
Bottom water or mist
Don’t overhead water small seeds – the water is too powerful and might move the seeds around in the tray, or worse–wash them away. Instead, pre-moisten the soil before you sow the seeds, and when the eventually does soil dry out, bottom water the trays.
To bottom water, slip a bottom tray without holes underneath your seed starting tray. Fill with an inch or two of water and sit the seed tray down in it. Let rest for 30 minutes and then drain the bottom tray, or remove it entirely.
Alternatively, use a spray bottle or a watering wand on the mist setting to gently mist your small seeds and seedlings. You may opt to use a humidity dome over the seedling flat to capture and hold moisture. Check out my article on humidity domes to learn how lids can help accelerate germination and produce better results.
Protect from the sun
As previously mentioned, smaller seeds need some light to germinate. However, the sun can actually burn seeds that are in direct light. Avoid this issue by using a shade cloth in your greenhouse or covering the seed trays with a mesh tray, which will block out light by about 50%. Take care not to water small seeds in the middle of the day, or the sun may burn them.
Use a heat mat
Achieve maximum germination of your small seeds by using a heat mat. These rubber mats are usually sized to fit between one and four standard seed trays and work in conjunction with a thermostat to raise the soil temperature to an ideal range for seed germination. Different seeds germinate best under varying temperatures – this guide compiled by the University of California details the ideal germination temperatures for a variety of vegetables.
Thin crowded seedlings
Especially true for small seeds that are multi-seeded in flat or outside, there will come a point when seedlings need to be thinned. This is not as much a concern for leaf vegetables like arugula and lettuce, as these seedlings tend to outcompete one another. To help the seedlings along, harvest the biggest plants first, and the slower-growing seedlings will fill in the space left behind.
Some root vegetables like carrots and radishes need to be thinned, or they won’t grow to their fullest potential. Save the thinned seedlings and enjoy the microgreens on a salad or sandwich instead of sending them to the compost pile!
While thinning may seem like a garden chore than can wait, if you leave this task on the back burner for too long you will have leggy, spindly seedlings rather than sturdy, healthy ones.
Conclusion
Small seeds may be more difficult to start, but it’s worth the extra effort. Some of the most delicious vegetables and the most gorgeous flowers come from the smallest seeds. Use these seed-sowing hacks and tools to your advantage, and sowing small seeds doesn’t have to be so hard!