

Recently, after moving to my new apartment, I decided to add a splash of color to the balcony by growing tulips in pots.
I was truly amazed at how easy it was, and the vibrant blooms brought so much life to my space.
If you’re looking to introduce tulip pots to your home setting, here’s a simple guide along with answers to some common questions to help you get started:
Why Grow Tulips In Pots?

For me, planting tulips in pots was a complete game changer.
Not only did I avoid digging up my garden which, as we all know, can be extremely messy, but I could also move the pots around wherever lighting conditions were ideal.
The pots keep the tulips safe and provide you with the flexibility to move them however you want.
The Best Time To Plant Tulips In Pots

Ideally, you want to plant tulips in cooler months since it allows the bulbs to experience the chill they need to bloom to their fullest potential in spring.
This makes late fall, around October or November, a good time to get your tulips planted in pots.
Selecting The Right Pot & Soil For Tulips

When I first planted tulips, I wasn’t really sure which pot would do the job well.
I learned the hard way that the pot needs to be large enough and have good drainage, so the bulbs don’t rot.
The tulips must have enough room to grow and thrive.
A large pot with at least a 6-inch depth should work just fine for most people.
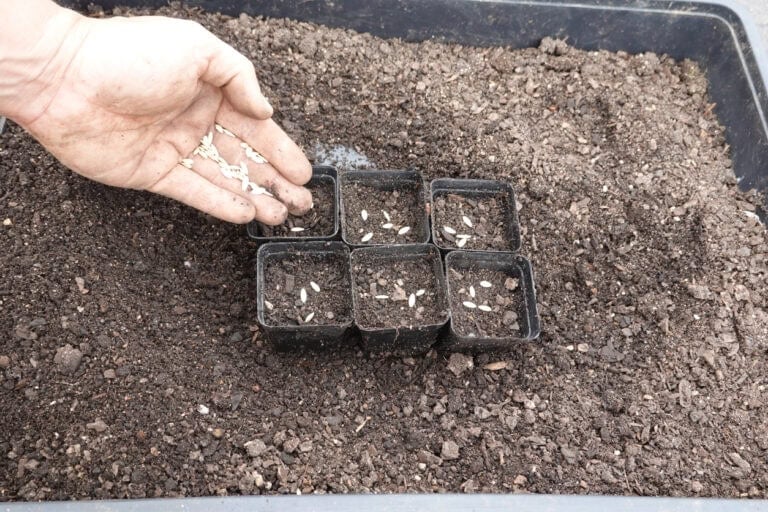
How To Plant Tulip Bulbs In Pots?

To plant tulip bulbs in pots, all you need is a pot with good drainage, well-draining soil, and a little patience.
Once sprouting begins, move it to sunlight and let the tulips grow.
How To Water & Fertilize Tulips In Pots?

Tulips in pots need relatively moderate watering; you want to keep the soil moist but never soggy.
When the top inch of the soil feels dry, water thoroughly but avoid going overboard as it may lead to waterlogging and root rot issues.
For fertilization, try a balanced, slow-release fertilizer when the tulips start showing some signs of growth. Feed your tulips this fertilizer every 2-4 weeks during the growing season to encourage strong and vibrant blooms.
5 Tips To Encourage Your Tulips To Bloom!

Tip 1 – Select The Right Bulbs
When trying to grow tulips at home, make sure you start with fresh, high-quality tulip bulbs. Firm, spot-free bulbs are more likely to bloom and produce vibrant flowers.
Mushy or damaged bulbs should be avoided at all costs.
Tip 2 – Chill The Bulbs After Planting
Tulip bulbs need some chilling after planting to grow properly.
For that, you need to place the tulip pot in a cool, dark location for 12-15 weeks and leave it alone.
Doing this stimulates winter conditions, providing the bulbs with the cold dormancy period they require for spring blooming.
Tip 3 – Provide Adequate Sunlight
Once your tulip bulbs begin sprouting, it’s important to move them to a sunny location immediately.
A good 6-8 hours of sun exposure every day is necessary for strong and healthy growth.
Tip 4 – Fertilize During The Growing Phase
When your tulips start growing, feed them a steady supply of slow-release fertilizer that contains a good blend of all the important nutrients they need.
Apply it in early spring to encourage stem growth and more colorful blooming.
Tip 5 – Diligently Deadhead After Blooming
After the blooming period has passed, remove dead or faded flowers to redirect the tulip’s energy into the bulb.
Doing so will allow for quicker and fresher, new growth.
Final Words

Growing tulips in pots has truly transformed my terrace and it’s only been 8 months since I’ve moved into this apartment! Watching the blooms emerge has become one of my favorite moments of the season.
I hope this guide helps you bring the same stunning blooms to your home, and that your tulips bring as much joy to you as they’ve brought to me.
Happy pot planting!


Happy Valentine’s Day 2025❣️My Daughter Received A Small Pot of Blooming Tulips from a coworker! She just moved into her first apartment and has a Cat. How can she Care for her Potted Blooming Tulips to keep them Happy? There are NO Instructions for this Anywhere on my Duck Duck Go ?
Hi Tami! Happy Valentine’s Day 😊💝
That’s such a lovely gift! To keep her potted tulips happy, she should place them in bright, indirect light and keep the soil slightly moist but not soggy—water when the top inch feels dry. Cooler temperatures (60-65°F) will help extend their bloom time.
Since she has a cat, be careful, tulips are toxic to cats if ingested, so keeping them out of reach is important!
Once they finish blooming, she can plant the bulbs outdoors in fall or store them in a cool, dry place until then. Hope this helps! 😊🌷🐱