Is your iris bed looking like a rhizome wrestling match? Time to break up the underground crowd! September is a great time to slice, dice, and untangle those roots so they head into fall healthy and ready for a strong spring.
Task 1: Fan Out, Split Up, Shorten Down
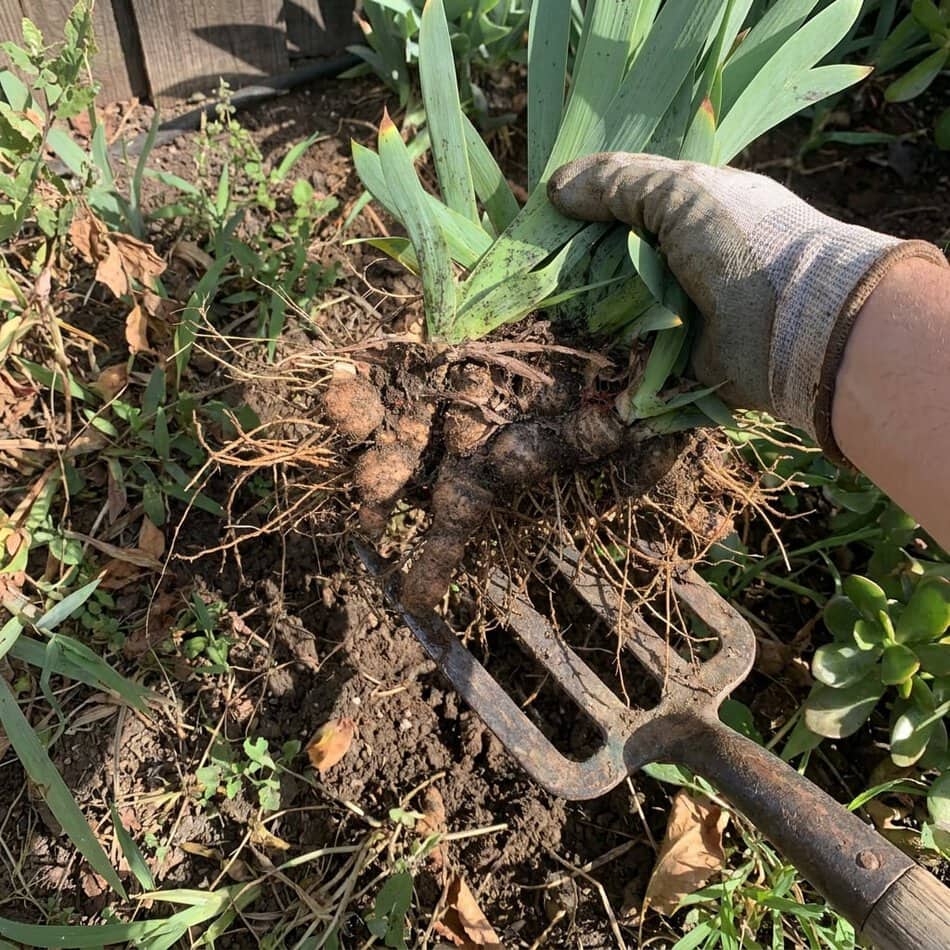
If you haven’t dug up your irises in three to five years, prepare for a workout. They don’t separate nicely; they form a concrete mass of tangled roots that will fight your garden fork every inch of the way. Muscle the mass out of the ground and pull or cut those knobby rhizomes apart.
Don’t skip trimming the leaves! If you leave those floppy green fans full length, they’ll keep losing moisture while your fresh divisions are still trying to put down new roots. Cut the foliage back to about 6 inches and shape each fan into a short V, if you’re feeling fancy.
Quick tip: Healthy old rhizomes can go on the compost pile, but anything showing rot, borer damage, or disease belongs in the trash.
If you’re wondering what to do with iris foliage at other times of year, we wrote a full guide on when and how to cut back iris leaves.
Task 2: Clean Cuts for Clean Living
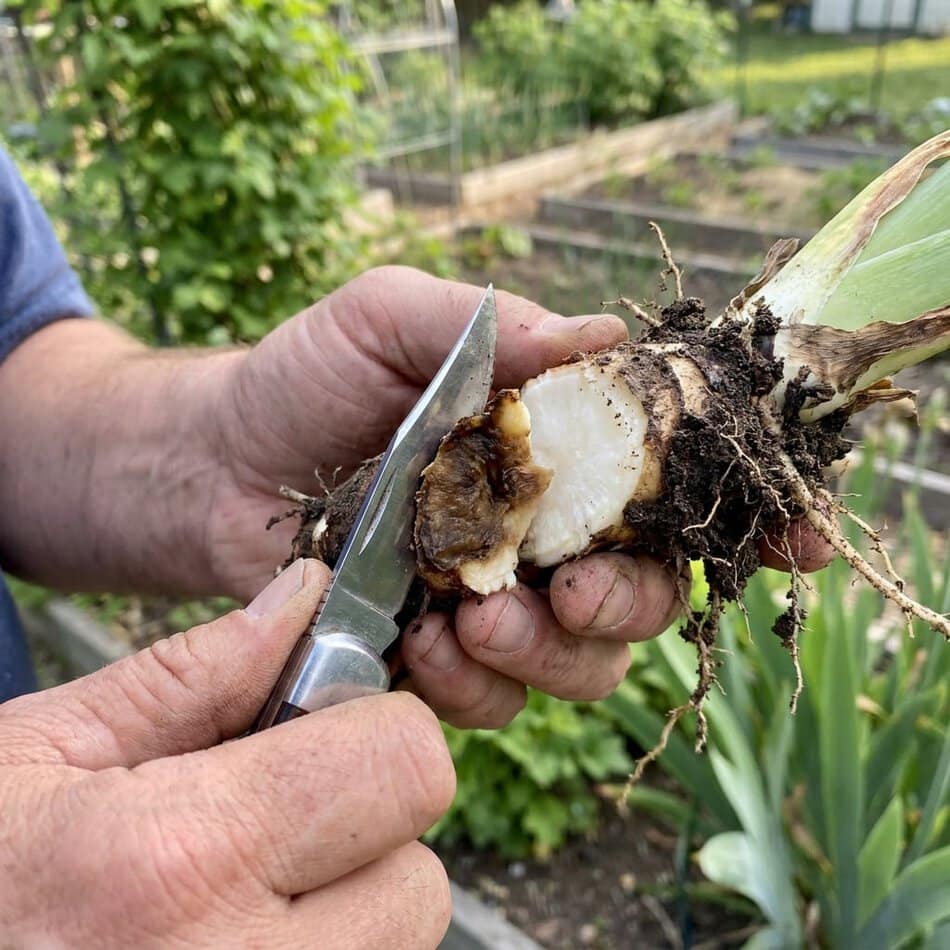
Here comes the gross part… rinsing the soil off the rhizomes often exposes the dud in the batch.
Feel a squishy spot pumping out a rancid stench? That’s bacterial soft rot doing what it does best. Look for tiny holes and sawdust-like frass too, that’s a good sign iris borers have been tunneling through.
Hack away every speck of soft, rotten tissue with a sharp pocket knife until you hit firm, healthy flesh. If a rhizome is badly damaged or rotten throughout, toss the whole thing instead. Also toss the infected scraps; just avoid the compost bin and pretend you never saw them.
Quick tip: Wipe your blade with 70% isopropyl alcohol after cutting diseased tissue and before moving on to another rhizome. Skip cleaning your knife, and you drag that slimy bacterial rot straight into clean rhizomes.
Task 3: Practice What You P-Rich
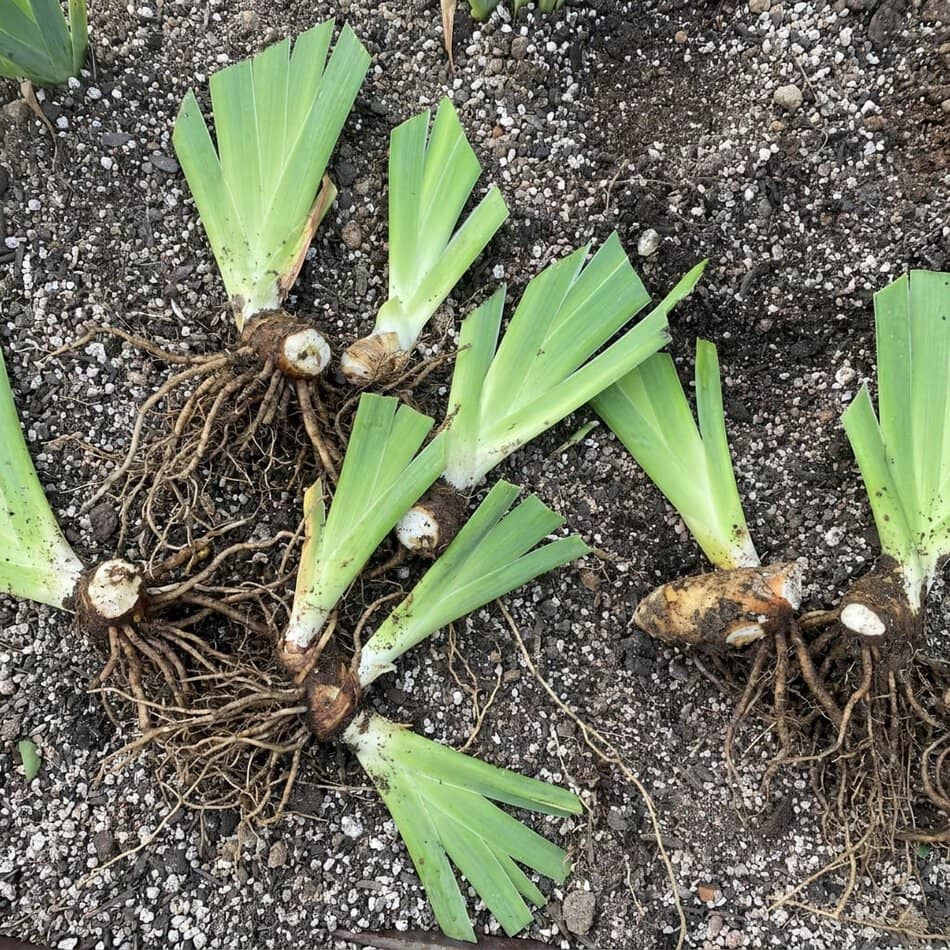
Trimmed rhizomes in hand? Leave the high-nitrogen fertilizer in the shed. Too much nitrogen pushes soft, leafy growth and can leave irises more prone to rot.
If your soil needs a boost, stick with a low-nitrogen fertilizer such as 5-10-10. Work it lightly into the surrounding soil before planting so the roots can reach the nutrients without sitting on a concentrated pocket of fertilizer.
Once the fertilizer is mixed into the soil, set the rhizome in place. Now your bed is prepped!
Quick tip: Don’t assume more phosphorus means more flowers. If you’re not sure what your iris bed actually needs, a soil test is the best place to start before adding more fertilizer.
Task 4: Close Encounters of the Shallow Kind
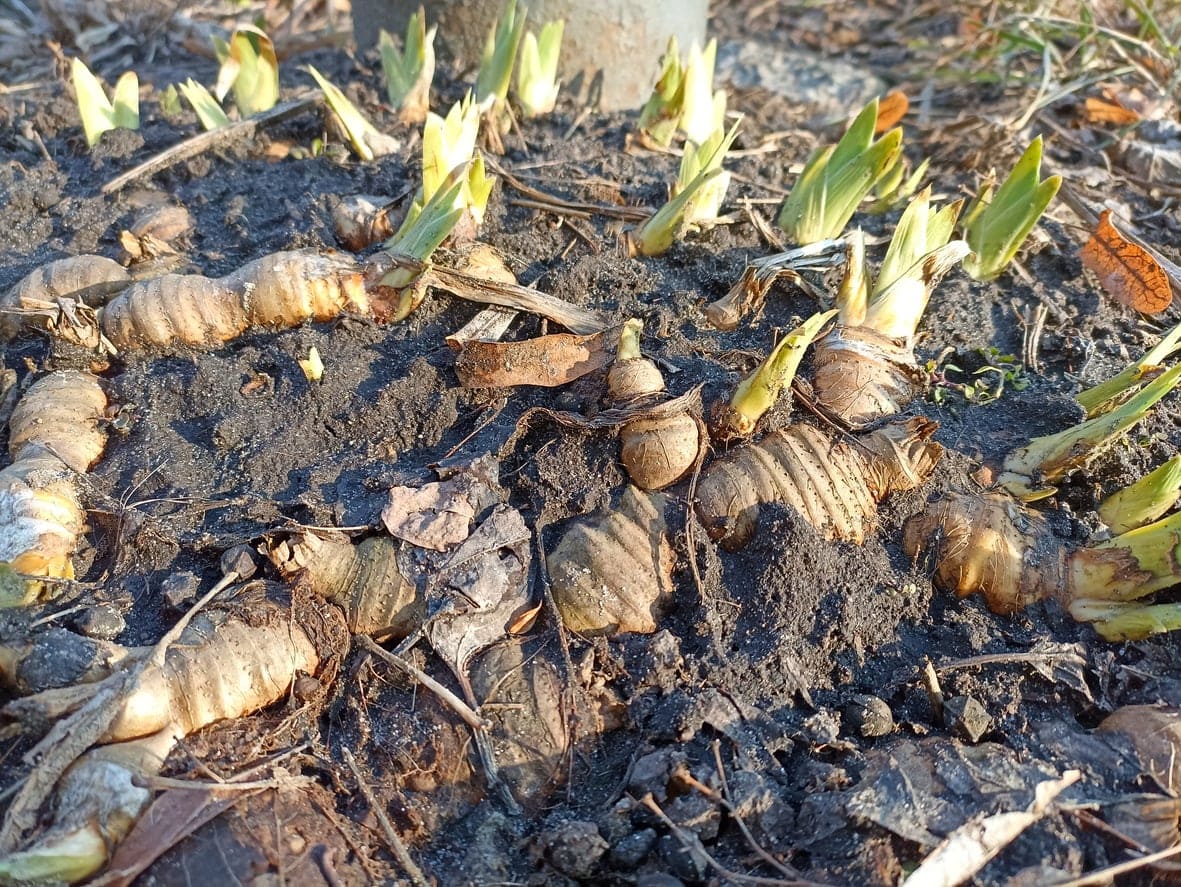
Lower the rhizome into your prepped spot and spread those long root strands down and out into the soil.
Backfill around the roots to anchor the plant, but don’t bury the rhizome too deep. The roots belong underground, while the top of the rhizome should sit right at the soil surface, with the top still visible. If it looks like a stranded alligator sneaking across the dirt line, you nailed it.
In very hot climates or especially light, sandy soil, a thin layer of soil over the top can help keep the rhizome from baking. Everywhere else, keep it shallow.
Task 5: Soak and Let Live
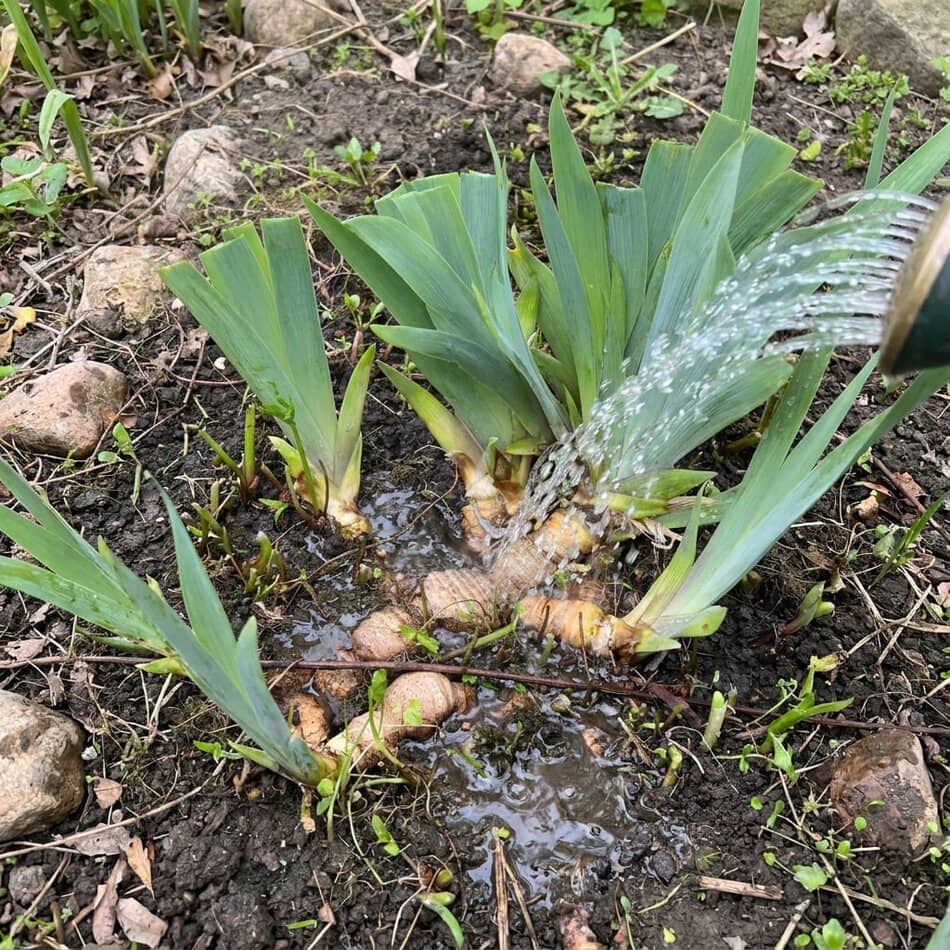
Right after you plant, give the rhizome a thorough soaking. That settles the soil around the roots and knocks out hidden air pockets.
After that, ease off (but don’t shut the hose down completely!). Freshly divided irises still need moisture while they’re putting down new roots. Keep the soil lightly moist but never soggy, watering deeply when needed until new growth or regular fall rain takes over.
What you don’t want is constantly damp soil sitting around the rhizome, because that’s when rot becomes much more likely.
Task 6: Rip and Strip, So It Doesn’t RIP

Those 6-inch leaf fans you cut won’t stay fresh forever. As fall wears on, the outer leaves on those short stubs will yellow, brown, and flop. Do not let dead foliage pile up against the rhizome.
Once a leaf turns brown or soft, pull it away at the base. If it doesn’t come away easily, don’t yank it! Just trim it off cleanly. Throw the dead foliage straight in the trash, especially if iris borers or leaf spot have been a problem in your garden.
Old iris foliage can harbor iris borer eggs and leaf spot fungus over winter, so leaving a messy layer behind only gives pests and disease somewhere to hide.
And if you’re already making the rounds with your pruners this month, we also put together a guide to 11 perennials worth trimming in September.
September’s Most Wanted
Think you’re finished once the rhizome hits the soil? Hah. Not quite. September pulls mind games, and your instincts will push you to ruin everything.
First comes the yellow panic. A few days in, some outer leaves may start fading, and your first instinct is to grab the hose. Check the soil first! Fresh divisions can shed older leaves while they settle in. Trim yellow outer leaves at the base, leave the green center alone, and don’t drown it.
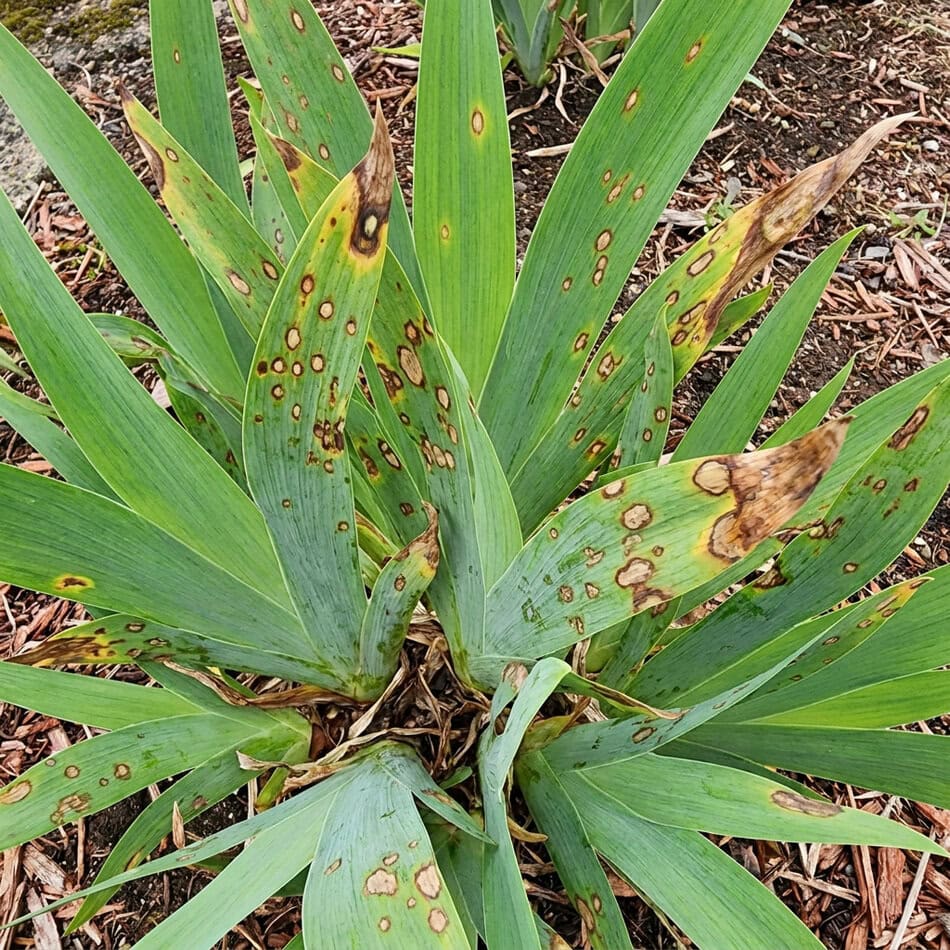
Next up: fungal leaf spot. Brown spots with yellowish or water-soaked margins are a classic sign. Remove badly infected leaves, trash them, and keep the foliage as dry as you can. Good cleanup is your first line of defense.
I-ris My Case
Caring for September irises isn’t about constant work. A firm anchor, shallow planting, and a clean bed go a long way toward getting them through the cold. Keep an eye on soil moisture, but otherwise, the best thing you can give them now is radio silence.