
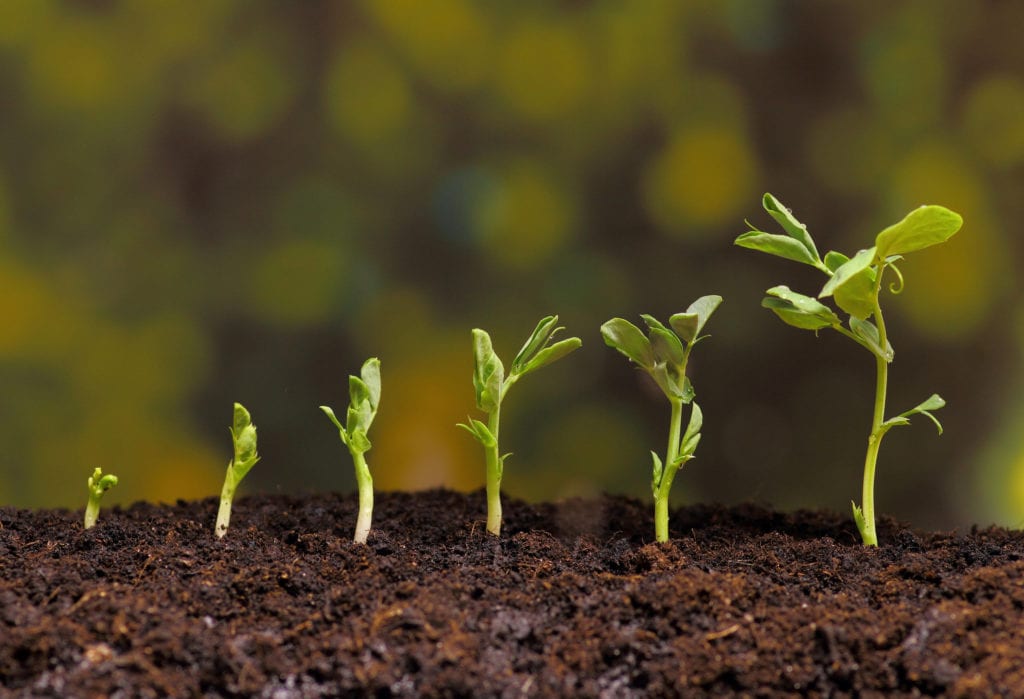
Peas are some of the easiest and most exciting crops to grow in your garden. They’re among the first spring crops to pop up and their hardy seedlings can easily withstand light frost and cold spells. You can sow pea seeds directly in the ground or undercover and they should provide you with a steady supply of pea shoots and pea pods.
But what if you can’t get them to germinate? I don’t like leaving germination to chance in my small garden, so I tend to start 80% of my crops indoors, under grow lights, but I’ve given directly-sown peas a go a couple of times. And that’s when I first noticed patchy germination and growing problems.
Peas might not germinate for a variety of reasons. Check that your batch of seeds isn’t expired or older than 2 years. Directly sown peas might not germinate in temperatures that are below 38F or above 75F. Waterlogged soil will cause pea seeds to rot. They may also fall prey to mice and birds.
As I mentioned, peas should be easy to germinate, and there’s no need to oversow them like many other smaller seeds. But if you’re having trouble with them year after year, you’re probably doing something wrong. Let’s have a look at the main reasons that cause pea seeds to remain dormant.
Pea seed quality
We all like to be thrifty, especially in our gardens, but relying on an old packet of seeds could be a recipe for disaster. You may have plenty of pea seeds lying around from past seasons, but before you get sowing, check that they’re still viable.
Pea seeds should typically last between 3 to 5 years, according to most resources, but if you’re having trouble growing them, always start with a fresh pack or one that is no more than 2 years old.
If you insist on using what you’ve got and you’re not sure how old your pea seeds are, you can try germinating a few and measure their germination rate. Sprout 10 or 20 seeds inside a moist paper towel (read below to learn how to do that), and count how many of those 10 or 20 seeds have actually germinated.
An 80% germination rate is excellent and should indicate that your pea seeds aren’t the problem. So next, check the growing conditions:
Sprouting temperatures
Depending on your soil temperature, peas could take anywhere from 7 to 30 days to germinate. Obviously, the colder the soil, the longer it will take for peas to sprout.
Pea seeds can sprout at temperatures as low as 38°F (3°C), but it’s not advisable to sow them that early. Instead, wait a little longer and they will surely catch up once the weather conditions are right. Peas germinate the fastest at around 55°F (12°C) to 75°F (24°C). Anything above that and they will get inhibited by the hot weather.
For peas sown directly, it’s best to follow the indications on the seed packets for best results and try not to sow them too soon.
Most temperate climates have short springs, which translate into short growing seasons for peas, which are a cool-weather crop. They don’t get to grow and produce fast enough before a heatwave sets in. There are a few things you can do to jumpstart the growing season and get your peas to produce a little earlier than normal:
You can heat up your soil by:
- building raised beds that thaw faster in spring;
- covering the soil with black foil;
- creating a mini-greenhouse effect with clear plastic – a process called solarization that both heats up the soil and kills weeds;
- covering the soil with floating row cover after sowing your seeds (this protects them from birds too).
The second thing you can do to get an early harvest (and I strongly suggest this), is to start all your pea seedlings indoors and only plant them outside once they are a few weeks old and there’s no more snow on the ground.
Watering pea seeds
Pea seeds are on the large side and it’s easy to notice their wrinkly, dehydrated appearance. In order to wake up from dormancy, pea seeds need to rehydrate to a full round size. This should occur naturally in the ground, after sowing, but it doesn’t always happen as planned.
Pea seeds can end up in air pockets inside the soil, and you may not be watering them enough during a dry spell.
But since most springs are cold and damp, underwatering is rarely to blame for poor germination rates. Rather, we tend to kill our seedlings with kindness by overwatering them – both in the soil and especially undercover. Too much water is always worse than too little.
If your springs are cold and rainy and your garden soil tends to get waterlogged, it’s even worse for sowing peas, as the seeds will most likely rot.
If it’s been 3 weeks and your peas haven’t emerged yet, carefully dig inside your drills and check the state of your pea seeds. If they’ve turned into a mushy mess, then water is to blame – hurry up and sow a second batch of peas before the weather gets too warm.
Mice, birds, and all kinds of critters
Did you dig up your drills to investigate, only to find no sign of those seeds at all? They haven’t just vanished, you may have some sneaky pests feasting on your seeds.
Guess what, mice LOVE pea seeds, and so do birds. You may even find empty seed hulls laying around, in which case sowing your pea seeds directly in the ground isn’t a great idea.
If you don’t have mice and suspect birds might be the problem, you can protect your soil with a row cover until seedlings get big enough, or a wire mesh installed inches away from the soil. In fact, protect them all the same – a layer of fleece adds a few degrees and keeps pigeons and other hungry birds away from your crops.
Some gardeners have even reported millipede populations interfering with their crop of peas. Millipedes can attack peas as soon as they germinate or invade seedlings from root to stem. The same thing can happen with slugs – while they won’t feast on your seeds, they will gladly eat young pea seedlings as soon as they emerge from the soil.
Again, the simplest answer to all these nuisances is to germinate and grow your pea seedlings indoors, and only transplant them when they’re old enough and ready to survive pest attacks.
How to improve your pea germination rates
Now that you’ve ditched your old pea seeds and purchased fresh ones, try doing something different for a change. I know sowing pea seeds directly is the easy way to go – but how’s that working out for you? Ready to make some changes? Try these tips:

Start pea seeds indoors in module trays
I love to start my pea seeds indoors, under grow lights, for predictable results. I use module trays that are quite small (like this 72-cell tray), because it’s not my intention to keep the seedlings inside for too long, and they’re very fast growers.
- Sow 1 pea seed per cell;
- Sow more seeds than you need and select the strongest seedlings;
- Keep the soil moist but don’t allow water to pool inside the bottom tray;
- Pea seeds should germinate indoors in about 7 days;
- Once they’ve germinated, don’t keep seedlings indoors for more than 2-3 weeks, or their roots will ball up.
Start pea seeds in guttering in a greenhouse
If you’re not a fan of module trays or grow lights and you’re the lucky owner of a greenhouse and polytunnel, starting pea seeds inside an old rain gutter can work just as well. It may take a little longer for peas to sprout in greenhouse temperature, so be patient and trust the process.
Some gardeners claim that peas, as well as beans, hate having their roots disturbed – and that may be true to some extent. This is why growing them in a gutter works so well – when they’re big enough, just slide them to their final location.
Here’s how to do it:
- Drill holes in your rain gutter to ensure good drainage;
- Fill up your gutter with homemade or purchased quality compost;
- Sow seeds 1 to 2 inches apart, cover with compost and pat down lightly;
- Keep the soil moist until they germinate;
- Place the guttering on a high shelf or hang it from the greenhouse structure to stop mice from accessing your seeds;
- Once your peas have germinated, dig a light trench in the garden and slide the contents of your guttering.
Germinate pea seeds in paper towels before sowing outside
To ensure maximum success, you can sprout your pea seeds indoors before sowing them outside. This is a process similar to chitting potatoes, and if you’re patient enough to do it, you can make sure that no pea seed will go to waste. It’s also a great way to check your seed packet’s germination rate.
To germinate your peas in the comfort of your house, place your pea seeds in a single layer inside damp paper towels. Place those paper towels in a ziplock bag and check for moisture and germination daily. Your pea seeds should sprout in 7 days – no light required.
Here’s the catch, though – as soon as your peas have sprouted, sow them in the garden immediately or they will go bad.
Presoak pea seeds before sowing
Soaking pea seeds uses the same principle as sprouting them in paper towels – it rehydrates the seeds and wakes them up from their dormancy. The only difference is you don’t have to wait for the sprouts to appear – you just want your pea seeds to plump up to a round shape.
Soak your pea seeds in lukewarm water overnight for 12 to 24 hours. Don’t exceed 24 hours and sow them in the ground or in modules soon after. If you’ve exceeded 48 hours of soaking, toss the pea seeds and start the process again.
Try a garden inoculant or buy treated pea seeds
Adding a garden inoculant to your pea seeds is a good idea if you want to ensure better germination rates and bigger plants with healthier root systems. A garden inoculant is a microbial amendment that forms a symbiotic relationship with the pea root system, allowing the plant to fix nitrogen from the air.
When using pea inoculant, simply mix the powder with the damp pea seeds, give them a good shake and sow right away, don’t allow it to sit for too long. Make sure not to supplement for any additional nitrogen, but you can add wood ash as a natural soil amendment if you want.
The inoculant won’t protect your pea seeds from rot and fungal disease, though. If your garden gets particularly damp in spring, you can use treated pea seeds as a last resort. Treated pea seeds are more resistant to soil-borne disease and can withstand cold and wet conditions – the same conditions that stop your seeds from germinating. This means you can sow your pea seeds earlier, directly in the ground, and worry less about the weather.
Keep in mind, though, that treated peas may contain fungicides and pesticides so do your research before using them.

Conclusion
Hopefully, you’ve identified the reason why your pea seeds aren’t germinating properly, or at least got some ideas about how to change things during your next growing season. Remember to check the main culprits for poor germination rates:
- old pea seeds
- weather that’s too cold or too hot
- overwatering or improper seed hydration
- mice and birds eating your seeds away
Most importantly, never give up trying, and you’ll find a method that works for you. Happy gardening!


